
On this page
Start here
Quick answer
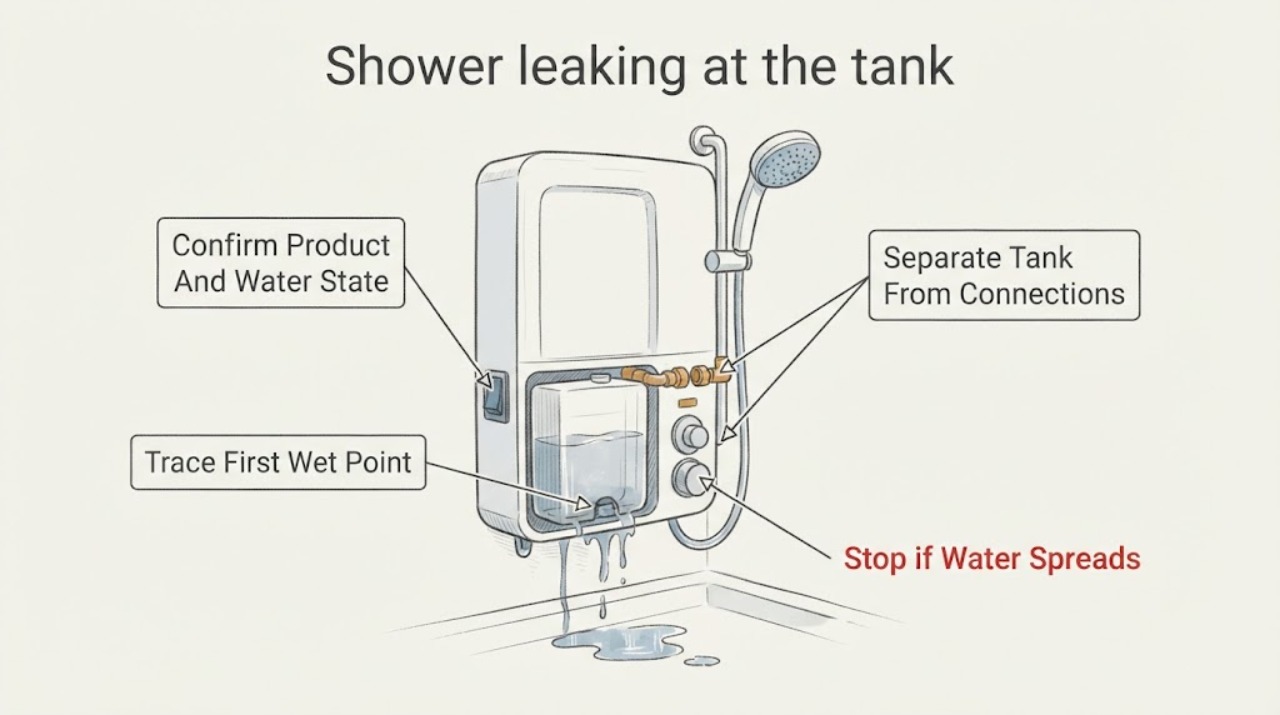
The term Whirlpool shower can describe a shower supplied by a Whirlpool-branded water-heater tank, so first confirm the model label and find the first wet point rather than assuming the tank shell is leaking. Dry the visible area, then check whether moisture returns at the tank's inlet or outlet, drain valve, temperature-and-pressure relief discharge, nearby supply pipe, shower valve or trim, drain, or wall or ceiling. Whirlpool's water-heater guidance says many leaks originate at fittings and connections, while a leak from the tank body or an untraceable leak needs qualified service. Keep the water supply off if the leak is active or growing; isolate electrical power only from a safe, dry position for an electric tank, and do not touch a gas control or hot vent as a homeowner repair. If water reaches electrical parts, the ceiling or wall is wet, the tank is bulging or corroded, a relief valve discharges, gas is smelled, or a carbon-monoxide alarm sounds, stop and use the appropriate plumber, HVAC or emergency boundary.
Work through in order
Diagnostic checks
Use only checks that match the exact appliance or system and its official guide.
-
Check 1
Stop using the shower and, from a dry safe position, record whether the water is hot or cold, whether the leak occurs only during shower use or also at rest, and whether a Whirlpool model label is on the tank or shower control.
Expected result: Classify the event as shower-use-only, continuous at rest, a puddle near a tank, moisture at a shower wall or ceiling, a tank with no visible model identity, or an active rapidly growing leak.
Next step: Keep the shower out of service, photograph the label and wet area, and continue only with safe, visible source tracing; close an accessible water shutoff if the leak is active and doing so does not require entering water.
Stop if: Stop immediately for water near electrical equipment, a ceiling bulge, structural movement, gas odor, or an active leak that cannot be controlled safely.
Why this matters
Why: A use-only leak makes the shower valve, trim, supply, or drain more likely; a leak at rest points toward a pressurized supply, tank fitting, relief path, or tank body. A Whirlpool water-heater label supports applying Whirlpool tank guidance, but absence of a label leaves fixture identity unresolved.
-
Check 2
After drying accessible surfaces, press separate fresh paper towels against the tank inlet and outlet connections, nearby water pipes, shower valve or trim, and the visible drain area without removing wall panels or insulation over a hot vent.
Expected result: Record which towel becomes wet first, whether moisture appears only when the shower runs, whether a threaded fitting or gasket is wet, and whether water emerges from the tank shell, wall, ceiling, or floor.
Next step: Photograph the first wet point and arrange the matching qualified trade: plumber for supply, tank, valve, or drain; building or restoration help when framing, ceiling, or subfloor is wet.
Stop if: Do not remove wall or ceiling finishes, pull insulation across a hot vent, reach into standing water, or tighten a fitting while the source and shutoff are unknown.
Why this matters
Why: A first wet point at an accessible connection supports a fitting or supply repair. Water from the tank shell, from behind the wall, or from a ceiling or floor indicates tank, concealed plumbing, or structural damage rather than a simple shower trim leak.
-
Check 3
From outside the tank enclosure, inspect the tank shell, drain valve, temperature-and-pressure relief discharge pipe, and the base or drain pan without capping the relief path or opening the tank.
Expected result: Classify the source as an inlet or outlet connection, drain valve, relief discharge, condensation-like puddle that disappears after heating, corrosion or moisture from the tank body, or no visible source.
Next step: Leave the relief path unobstructed; have a plumber assess a fitting, drain valve, pressure or expansion issue, or tank-shell leak. Do not assume a replacement relief valve solves a pressure-related drip.
Stop if: Stop for a corroded, bulging, hot, or leaking tank body, continuous relief discharge, steam, or any need to open, drain, or modify the tank.
Why this matters
Why: Whirlpool states that many water-heater leaks are at fittings and connections, while relief-pipe drips can reflect excessive household pressure or thermal expansion. Moisture from the tank body or an unknown source cannot be safely treated as a loose connection.
-
Check 4
With the shower still unused, inspect the shower valve faceplate, escutcheon, tub or shower base, drain, visible supply connections, and the room below for fresh moisture; use a dry towel or tissue rather than opening the wall.
Expected result: Note whether water appears around the valve only during flow, around the drain while water is poured or the shower runs, at a supply connection even when the shower is off, or in a wall, ceiling, or floor outside the enclosure.
Next step: Keep the shower off and give the location and timing to a qualified plumber; request building or restoration assessment when the wall, ceiling, or subfloor is wet.
Stop if: Do not remove trim, cut tile or drywall, inject sealant into an unknown cavity, or keep using the shower to reproduce a leak that is reaching structure.
Why this matters
Why: Valve or trim moisture during use suggests a fixture seal or valve issue; drain moisture during flow suggests drain or pan sealing; continuous supply moisture suggests pressurized plumbing. Moisture outside the enclosure can indicate concealed leakage or failed waterproofing.
-
Check 5
Once the first wet point is documented, check the water-heater type from its label and decide whether a safe accessible water shutoff is needed; for an electric tank, keep power isolated only from a dry accessible disconnect, and for a gas tank do not manipulate gas controls as a leak repair.
Expected result: Record electric or gas fuel, water shutoff status, whether water is still flowing, whether any electrical component is wet, and whether gas or combustion warnings are present.
Next step: Leave the tank or shower out of service and arrange qualified service with the model, first wet point, photos, timing, and shutoff observations; use emergency services for gas or CO danger.
Stop if: Stop for gas odor, a CO alarm, smoke, electrical arcing, water at electrical parts, scalding water, or any need to open energized equipment.
Why this matters
Why: An active water leak requires damage control, but fuel and electrical isolation are equipment-specific. Whirlpool instructs owners to follow the printed manual and seek qualified help when skills or access are insufficient; the correct next step may be plumbing, HVAC, electrical, or emergency response.
Use your observations
Decision map
Find the observation that best matches what you see, then follow the next safe action.
-
PATH 01Safety boundary
What you see
The first wet point is an accessible Whirlpool tank inlet, outlet, drain-valve, or other threaded connection, and the tank shell is dry.
Do this next
Control the water safely and have the connection assessed or repaired with model-appropriate parts; do not force a hot or pressurized fitting.
Why this path and its safety boundary
Why it matters: A connection, gasket, or threaded seal is more likely than a failed tank body, consistent with Whirlpool's statement that many leaks occur at fittings and connections.
Safety stop: Stop for corrosion, active spray, scalding water, inaccessible shutoff, or any need to drain or open the tank.
-
PATH 02Safety boundary
What you see
Moisture returns from the tank body, seam, base, or corrosion rather than from an inlet, outlet, drain valve, or relief connection.
Do this next
Keep water and the tank's energy source safely off and arrange qualified water-heater service or replacement assessment; protect the structure from further water.
Why this path and its safety boundary
Why it matters: A tank-shell leak is not a fitting-tightening problem and may progress to significant water damage.
Safety stop: Do not patch, drill, weld, cap, or open the tank, and do not restore energy while the tank is leaking or empty.
-
PATH 03Safety boundary
What you see
Water is first seen at the temperature-and-pressure relief discharge pipe, especially when the tank heats.
Do this next
Keep the discharge path open and have a qualified plumber evaluate pressure, expansion control, and the relief assembly.
Why this path and its safety boundary
Why it matters: Whirlpool associates relief-pipe drips with household water pressure or thermal expansion; blocking or blindly replacing the relief valve can remove a safety path without solving the cause.
Safety stop: Never cap or plug the relief discharge, hold it closed, or continue operating when discharge is forceful, hot, or continuous.
-
PATH 04Safety boundary
What you see
The tank remains dry, but water appears around the shower valve or trim only during use, or at the drain or base when water flows.
Do this next
Stop using the shower and have a qualified plumber inspect the valve, drain, pan, and waterproofing; verify the shower brand and model before selecting parts.
Why this path and its safety boundary
Why it matters: The leak is more likely in the shower fixture, drain, pan, or local seal than in the Whirlpool tank; the Whirlpool water-heater guidance is not a part-compatibility guide for the shower fixture.
Safety stop: Do not remove trim or cut into the wall or base merely to chase a moving wet spot.
-
PATH 05Safety boundary
What you see
The first visible moisture is on a wall, ceiling, floor, or room below, or no accessible source can be found after drying and observing.
Do this next
Keep the shower and affected water-heater system out of service as appropriate, control an accessible shutoff, and arrange qualified plumbing plus building or restoration assessment.
Why this path and its safety boundary
Why it matters: A concealed supply, drain, tank connection, waterproofing, or structural leak is possible; continued testing can enlarge damage.
Safety stop: Do not open walls, ceilings, or floors without a plan to control water, electrical, and structural hazards.
-
PATH 06Safety boundary
What you see
Water reaches electrical equipment, a gas odor is present, smoke or arcing occurs, or a carbon-monoxide alarm sounds or symptoms appear.
Do this next
Leave the danger area, call emergency services or the gas utility from a safe location, and do not reenter or operate the equipment until responders or trained personnel clear it.
Why this path and its safety boundary
Why it matters: The event is now an electrical, gas, or CO emergency rather than a routine plumbing leak.
Safety stop: Do not operate switches in a gas-odor situation, touch wet electrical parts, relight a gas appliance, or silence and ignore a CO alarm.
Helpful context
Understand the symptom
Confirm what the Whirlpool identity refers to
Whirlpool's current official water-heater support pages cover tanks, fittings, drain valves, relief discharge, and gas or electric water-heater safety; they do not establish that a shower enclosure or shower valve is Whirlpool-branded. If the shower is simply supplied by a Whirlpool tank, use the tank and plumbing decision path below. If a Whirlpool model label is not present on the tank or shower control, do not assume Whirlpool-specific parts or instructions fit.
The first wet point is more useful than the puddle
Water can travel along insulation, pipes, framing, a tub edge, or a floor before it appears. Dry the visible area, place a fresh paper towel at each accessible connection, and watch which towel becomes wet first. A connection leak is different from water emerging through the tank body, a shower valve or trim, the drain, or a wall or ceiling; each needs a different trade or repair boundary.
Tank, relief discharge, and hot-water safety are not DIY guesses
Whirlpool notes that condensation can look like a small puddle on a new or heavily used tank and may disappear once the tank is hot, but recurring moisture still needs a source check. Drips from a temperature-and-pressure relief discharge can be related to pressure or thermal expansion. Do not cap, plug, or defeat the relief path, and do not treat a tank-shell leak as a fitting that can be tightened.
A shower leak can involve structure or electricity
A wet wall, ceiling, subfloor, or electrical component can continue to damage the building after the visible shower stops. Stop using the shower, control the water only from a safe accessible shutoff, and involve a plumber or building professional when the first wet point is behind the wall, under the floor, or not visible. For fuel-burning equipment, keep combustion and carbon-monoxide safety ahead of leak diagnosis.
Safety boundary
Stop conditions
- Stop using the shower and control an accessible water shutoff for an active or growing leak; do not enter standing water to reach a valve.
- Keep the water-heater energy source off when the tank body leaks, a relief discharge is continuous, water reaches electrical parts, or the tank may be empty; use only a safe accessible disconnect and qualified help.
- Do not cap or plug a temperature-and-pressure relief discharge, patch or open a tank, remove wall or ceiling finishes, or force hot or pressurized connections.
- For gas odor, do not operate switches or relight the appliance; leave and contact the gas utility or emergency services from a safe location.
- For a carbon-monoxide alarm or possible symptoms, move outside, call emergency services, and do not reenter or operate the fuel-burning appliance until trained personnel allow it.
- Stop routine tracing when the first wet point is behind the wall, ceiling, floor, or tank shell, or when the source remains unknown; arrange qualified plumbing and structural assessment.
Only after diagnosis
Potential parts
- Whirlpool tank inlet, outlet, or threaded connection seal
Consider only when the first wet point is a confirmed Whirlpool tank connection and a qualified diagnosis identifies a seal or fitting issue.
Match the exact water-heater model and potable-water requirements; do not assume a shower-valve or generic plumbing part fits. - Whirlpool temperature-and-pressure relief assembly
Consider only after a qualified plumber evaluates the relief discharge, water pressure, and thermal expansion; a drip is not proof the valve itself failed.
Never cap the relief path; confirm the exact model and required safety rating before replacement. - shower valve, trim, drain, or waterproofing component
Consider only when the tank is dry and the first wet point is confirmed at the shower fixture, drain, pan, or concealed waterproofing.
Verify the actual shower fixture brand and model; Whirlpool water-heater documentation does not establish shower-part compatibility.
When checks do not resolve it
Need a professional?
Arrange qualified plumbing service when the first wet point is a tank fitting, relief discharge, drain valve, shower valve, drain, or concealed connection; when the tank shell is wet or corroded; when a Whirlpool model cannot be confirmed; or when the leak remains after safe source tracing. Add electrical or building professionals for wet wiring, ceiling, wall, or subfloor damage, and use emergency services or the gas utility for gas odor, a CO alarm, smoke, arcing, or possible CO symptoms.
Common questions
FAQ
Does Whirlpool make the shower itself?
The official Whirlpool material opened for this topic concerns Whirlpool water heaters, not a generic shower enclosure or shower valve. Confirm the model label before using Whirlpool-specific parts or instructions; if the first wet point is the shower valve, drain, wall, or ceiling, use qualified plumbing assessment for that fixture or structure.
How can I tell whether the tank or a connection is leaking?
Dry the accessible area and use separate fresh paper towels at the tank inlet, outlet, drain valve, relief discharge, and nearby pipes. Moisture returning at a connection supports a fitting or seal issue; water from the tank body, wall, ceiling, floor, or an unknown point needs qualified service.
Is a dripping relief pipe just another shower leak?
No. Whirlpool notes that drips from a temperature-and-pressure relief discharge can be related to household pressure or thermal expansion. Keep that safety path open and have a qualified plumber evaluate it; never cap or plug the discharge.
Read the exact guide
Official sources
- What to Do If It LeaksWhirlpool Water Heaters · Whirlpool water-heater leak identification, fittings, relief pipe, tank, and manual-based safety guidance
- Carbon Monoxide Fact SheetU.S. Consumer Product Safety Commission · Carbon-monoxide hazards from fuel-burning appliances, alarm response, and reentry boundary
- Whirlpool Water HeatersWhirlpool · Whirlpool brand water-heater product identity and current support applicability
- Leaks and DripsWhirlpool Water Heaters · Whirlpool water-heater puddles, connections, relief discharge, pressure, and expansion guidance
Community feedback
Share a repair observation
Share a plain-text repair observation. Accepted observations are published automatically; this page may take a moment to update.