
Repair problem
Leaking Troubleshooting Guides – Page 2
Published FixGraph guidance for diagnosing and responding to leaking.
Matching published guides
Choose a guide that matches the service, equipment, and conditions you are seeing.
-
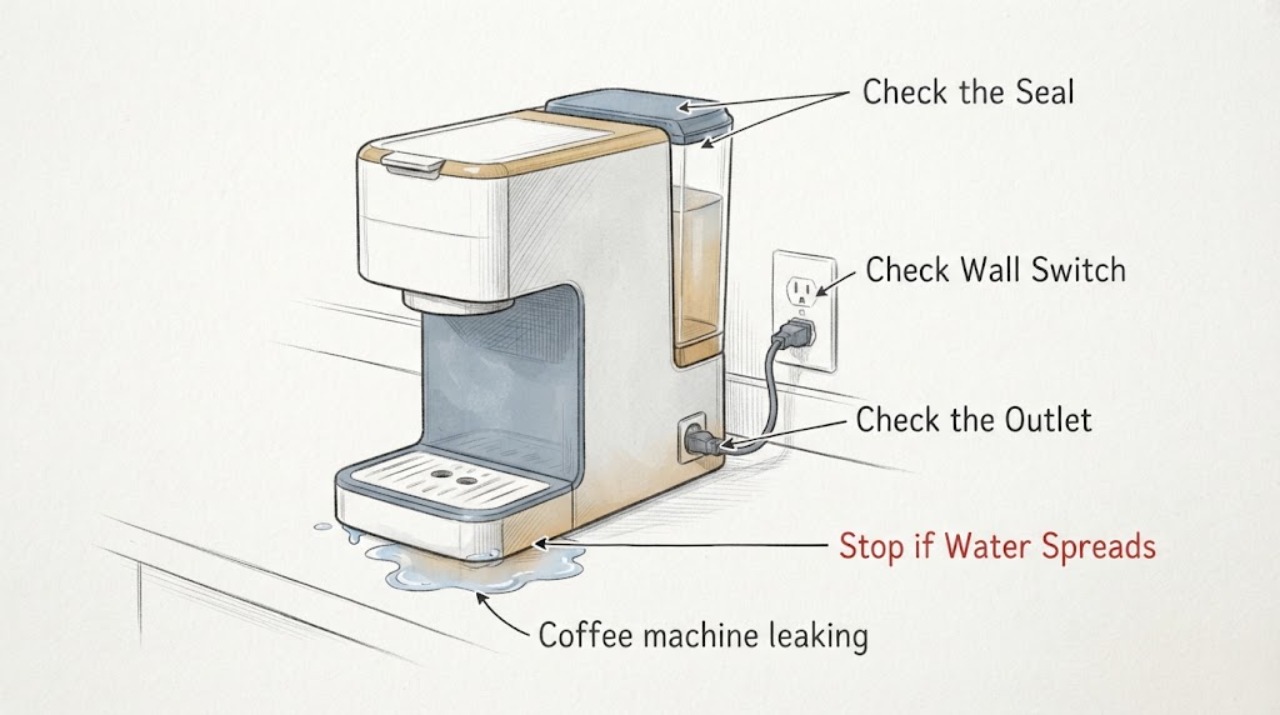
Coffee machine leaking
For a leaking coffee machine, first locate whether water comes from the tank, drip tray, brew group/filter holder, steam wand, or cabinet. Reseat accessible tanks and seals, clean scale from the inlet or brew path as the model allows, and make one controlled retest. Unplug and seek service for cabinet leaks or water near electrics.
-
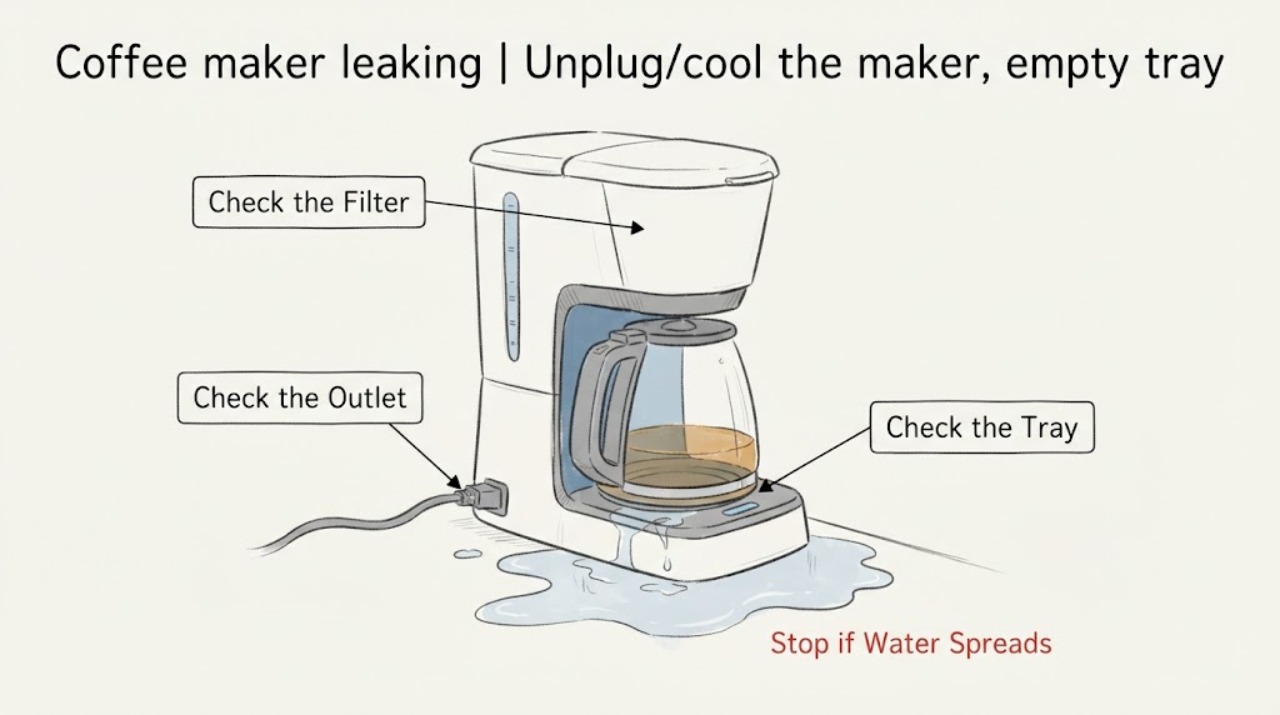
Coffee maker leaking
A leaking drip coffee maker is traced by where water first appears: reservoir, basket/dripper, carafe, or base. Check the fill line, filter/basket seating, gasket, grind and filter blockage with the maker unplugged and cool. Stop for a base leak or water near the cord.
-
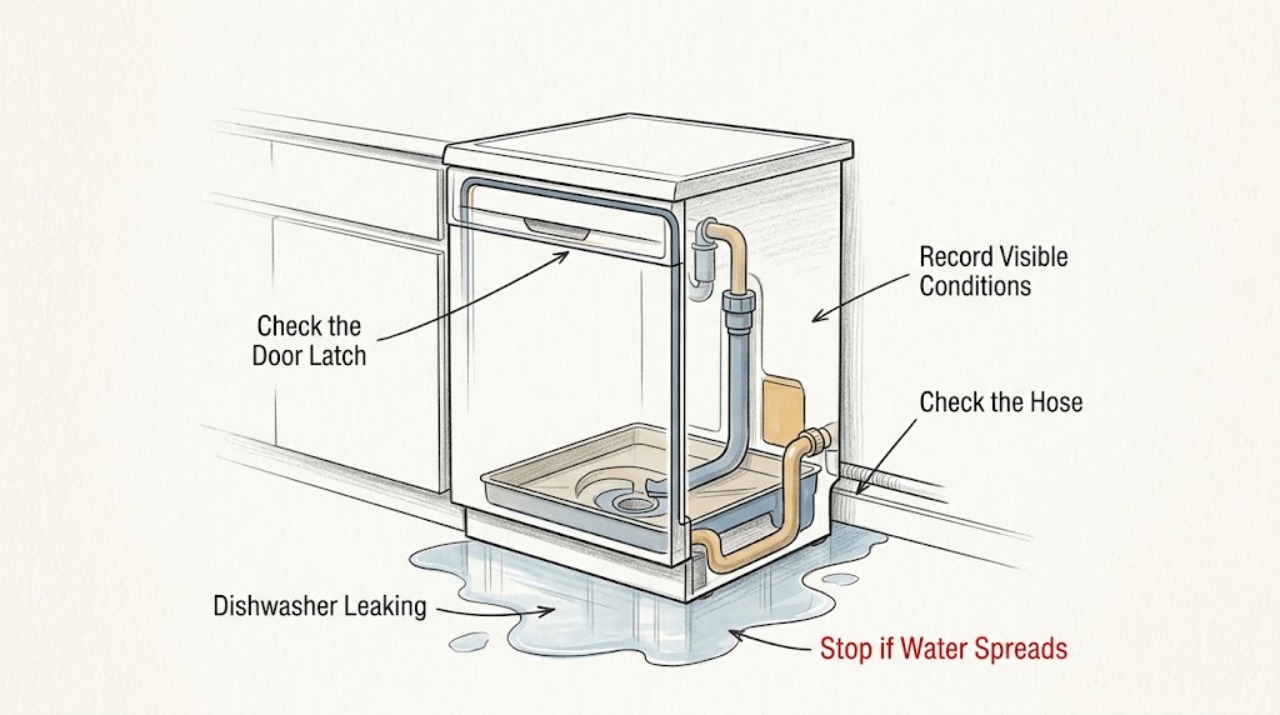
Crosley Dishwasher Leaking
Stop the cycle if water is reaching the floor, wiring, or the dishwasher base, and keep hands away from wet electrical areas. First identify whether water is coming from the door/front, underneath, an inlet or drain connection, or foam overflowing from the tub.
-
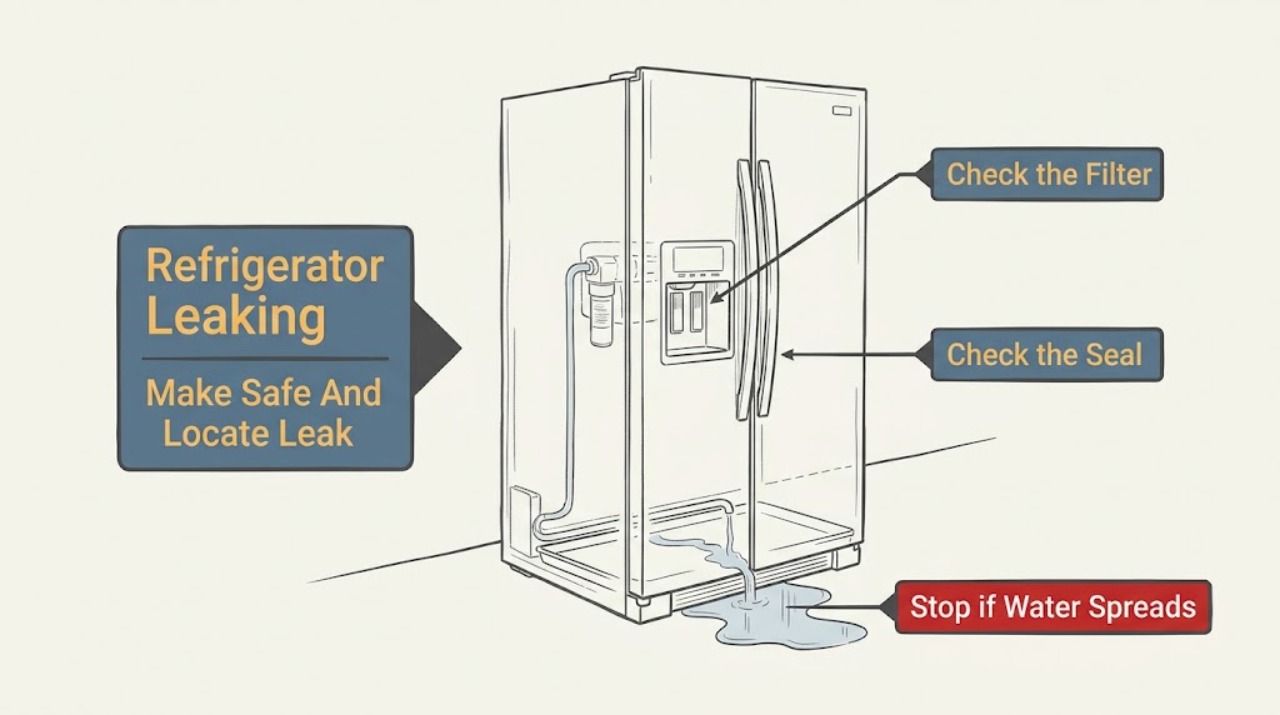
Crosley Refrigerator Leaking: Safe Checks
If a Crosley refrigerator is leaking, first protect people and nearby equipment: if water is reaching an outlet, cord, control, light, or other electrical part, stop using the refrigerator and isolate power only by a safe, dry method. Identify the exact model and whether the water is coming from the connected ice-maker or dispenser line, inside the fresh-food or freezer compartment, underneath the cabinet, or from normal condensation.
-
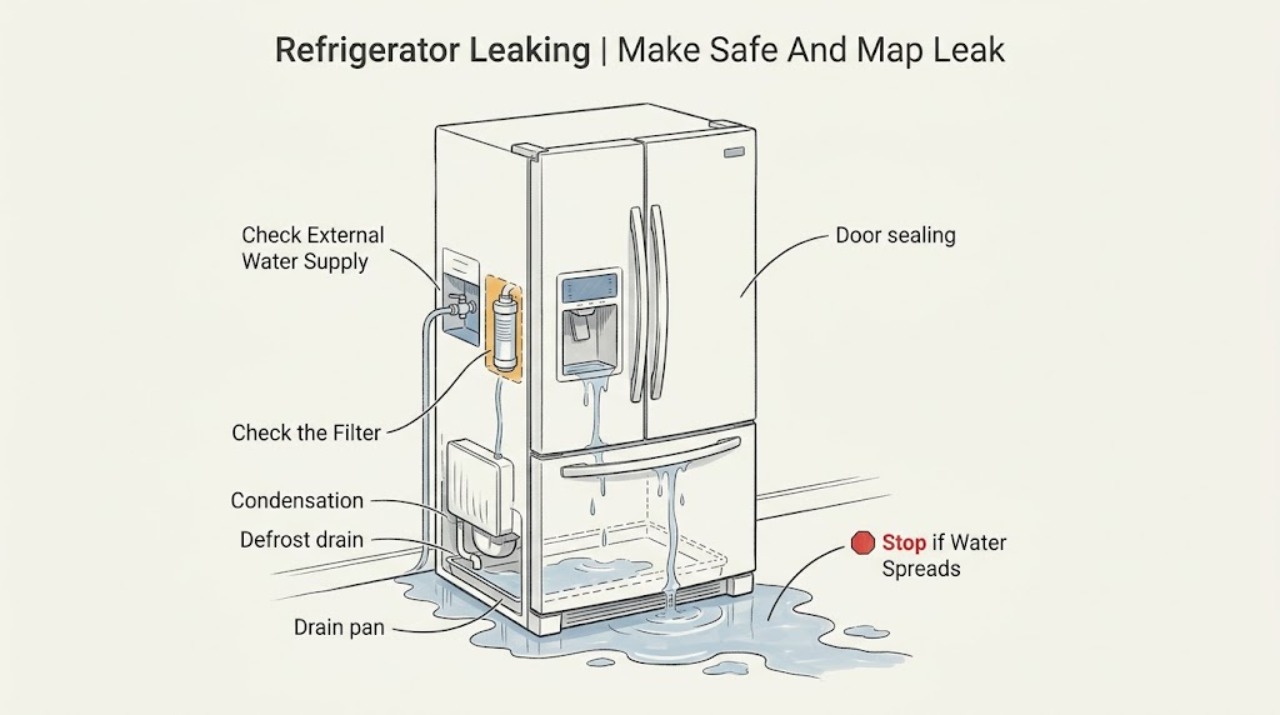
Dacor Refrigerator Leaking: Find the Source Safely
If a Dacor refrigerator is leaking, first keep water away from the plug, outlet, cord, controls, and other electrical parts. If water is near them, stop using the refrigerator and isolate power only from a safe, dry position; do not touch a wet plug.
-
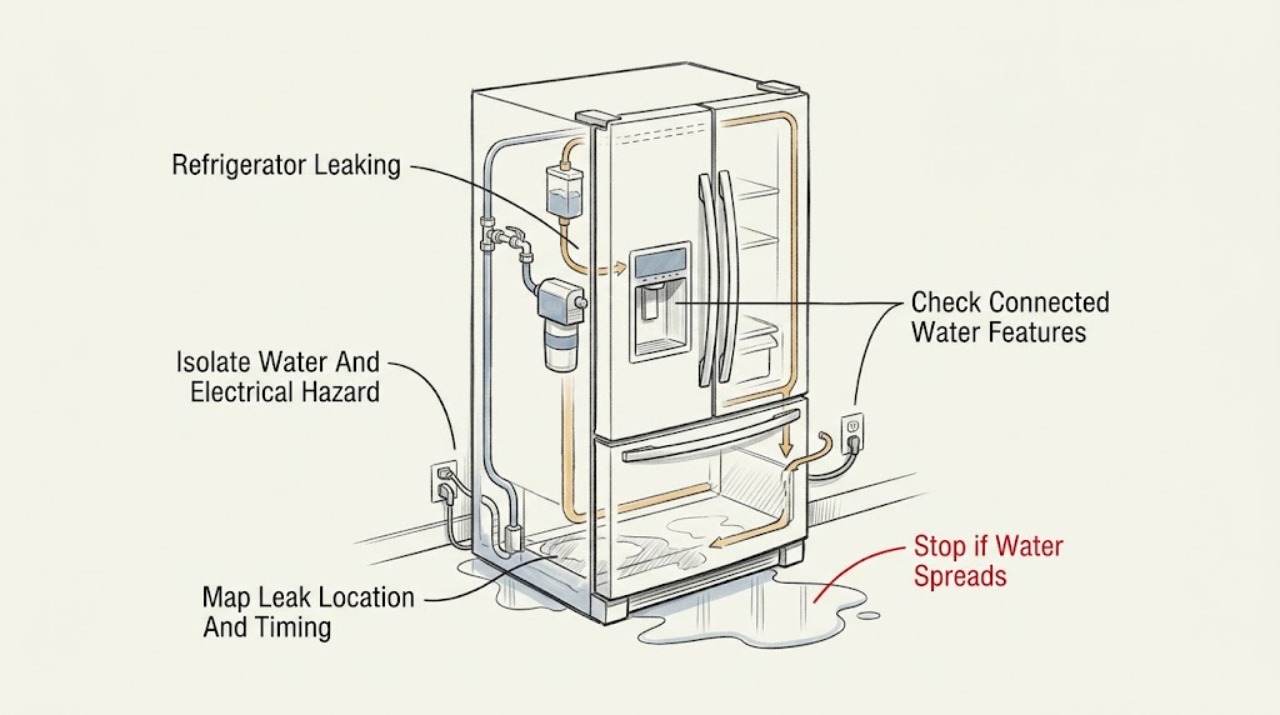
Daewoo Refrigerator Leaking: Find the Water Source Safely
First protect yourself and the floor: if water is near the plug, socket, controls, or wiring, do not reach through the water to unplug the refrigerator; isolate power from a dry, safe location and stop the water supply if the model has one. Then dry the outside and identify when the leak returns.
-
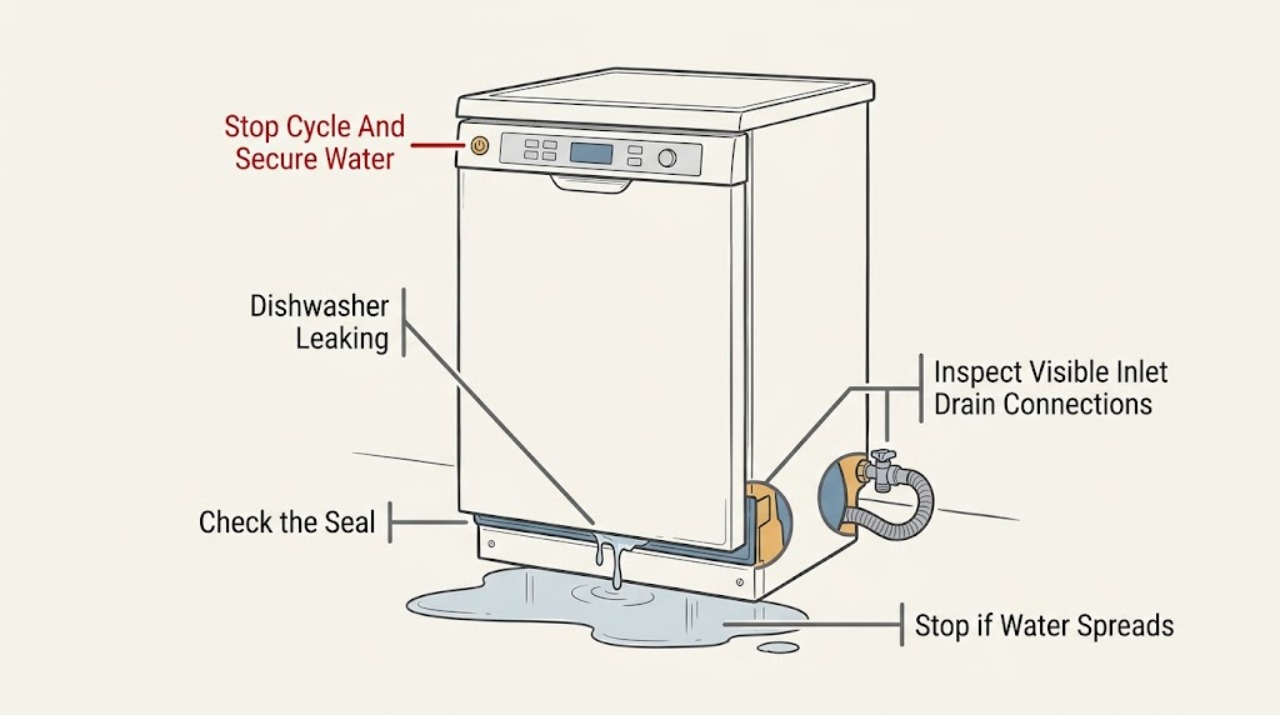
Danby Dishwasher Leaking: Door, Suds, and Hose Checks
Stop the cycle, keep hands and feet away from hot water, and turn off the water supply. If water is on the floor, at the base, or near the plug, outlet, controls, or other electrical parts, do not restart the dishwasher; isolate power only from a safe, dry location and arrange service.
-
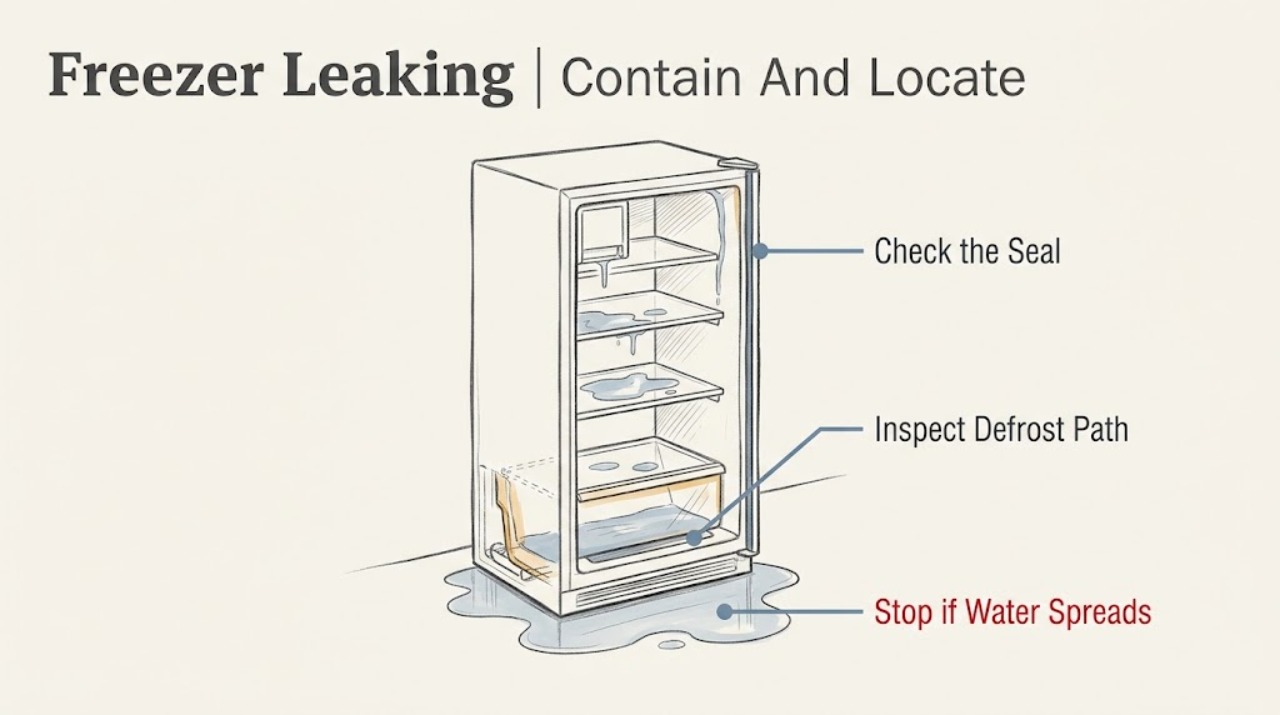
Danby Freezer Leaking: Check the Door Seal, Defrost Path, and Water Connections
When a Danby freezer is leaking, first protect the floor and food, then locate whether the water starts at the door, inside the cabinet, under the appliance, behind it, or at an optional ice-maker connection. Danby identifies a clogged defrost drain, damaged door seal, and an unlevel unit as common leak checks, while model manuals explain that defrost water may collect in a drip pan and that frost can keep the door from closing.
-
Danby Refrigerator Leaking
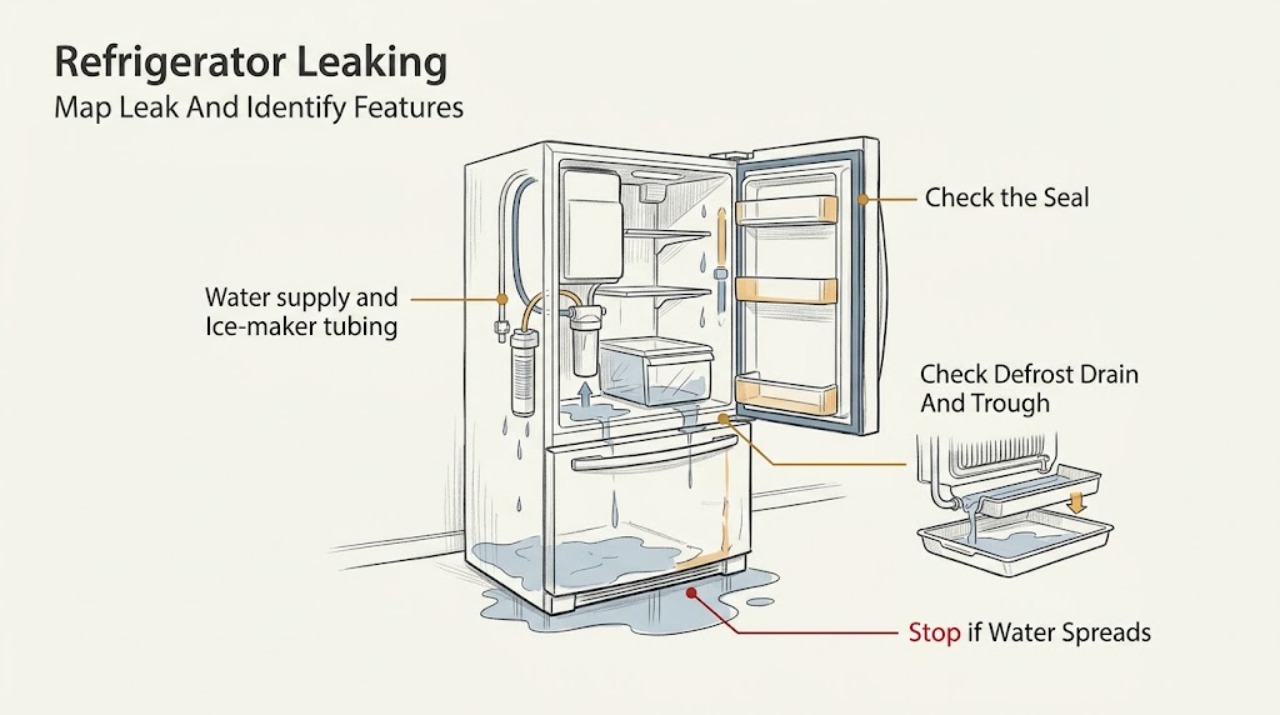
First locate where the water starts and whether the refrigerator has a plumbed dispenser or ice maker. Danby identifies a clogged defrost drain, damaged door seal, and an out-of-level refrigerator as initial leak checks; its manuals also distinguish defrost water overflowing a trough from water caused by frost and moisture entering through a door left open.
-
Danby Wine Cooler Leaking: Condensation, Drip, and Door Checks
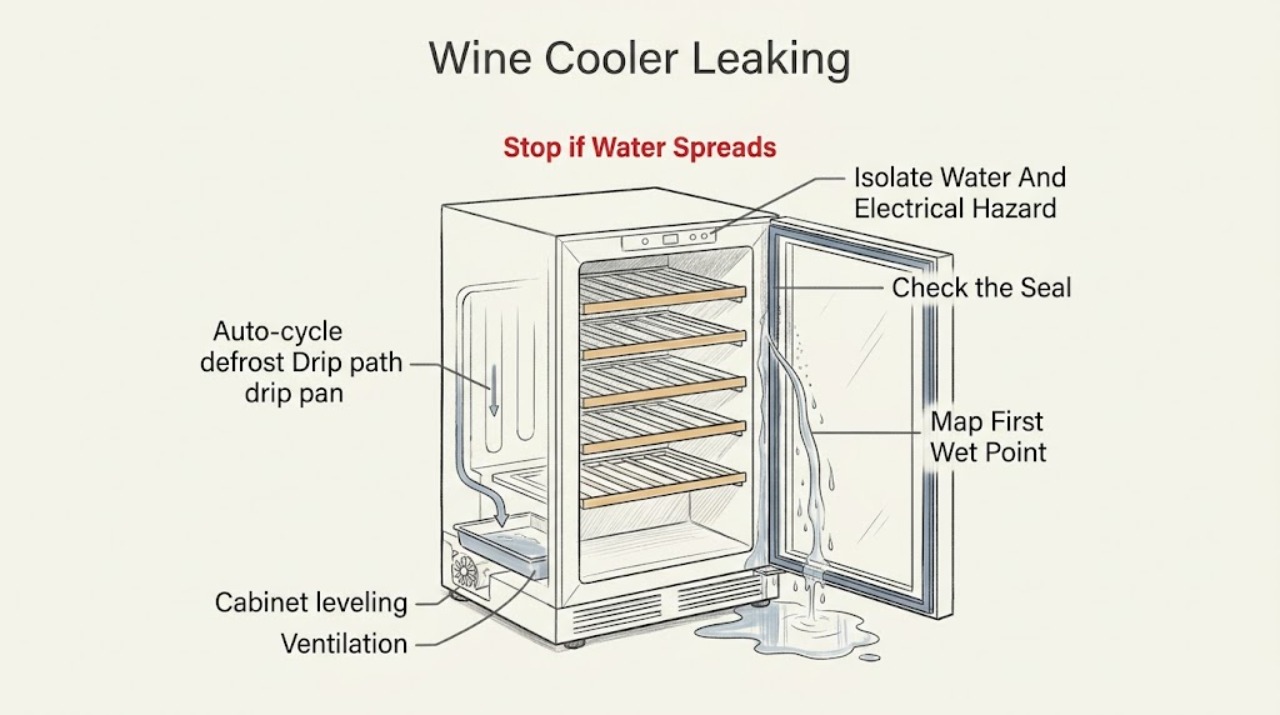
First distinguish a spilled bottle or condensation from an active internal leak. If water is near the plug, socket, control, or wiring, do not touch the wet appliance; isolate power from a dry, safe location and leave it out of service.
-
Dehumidifier Leaking
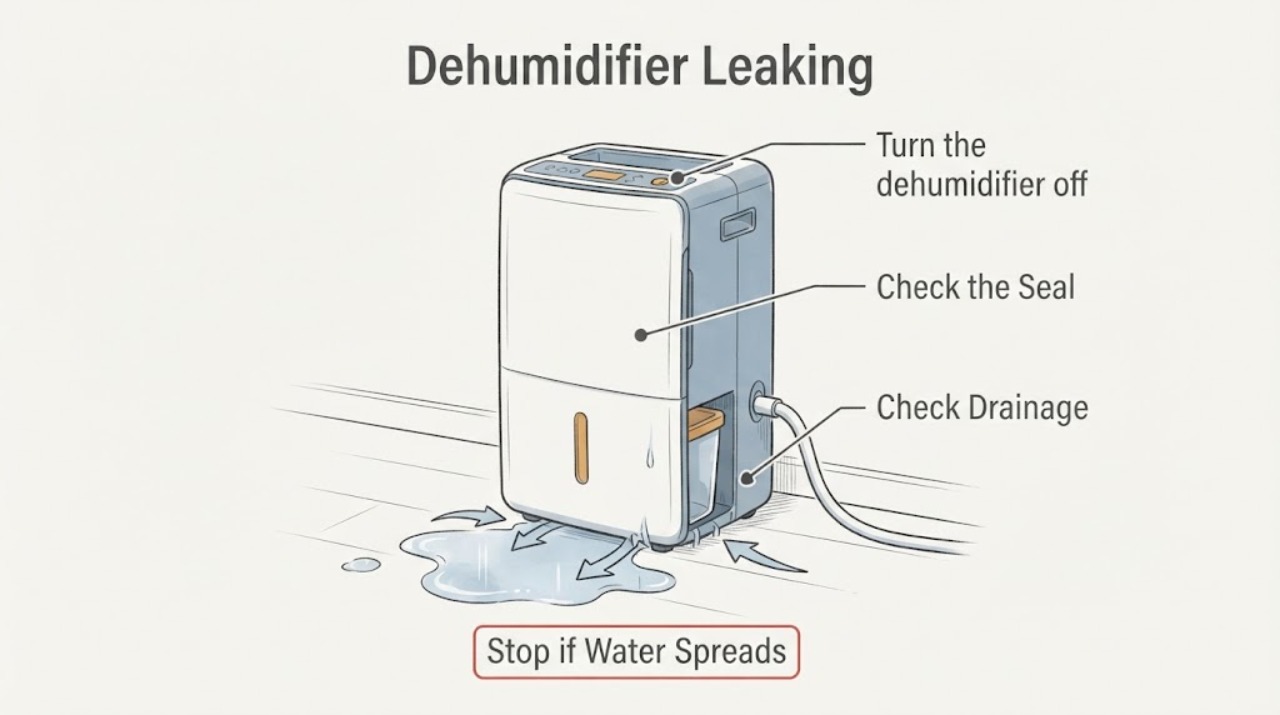
A leaking dehumidifier is first separated by location: bucket, continuous-drain connector, or base. Turn it off and keep water away from electrical parts, place the unit on a level floor, inspect the bucket for cracks or tilt, and check the drain-hose connector washer and downhill routing. Heavy frost can overflow the base; a cracked bucket, recurring leak, or leak from inside the cabinet needs service.
-
Delonghi Coffee Maker Leaking
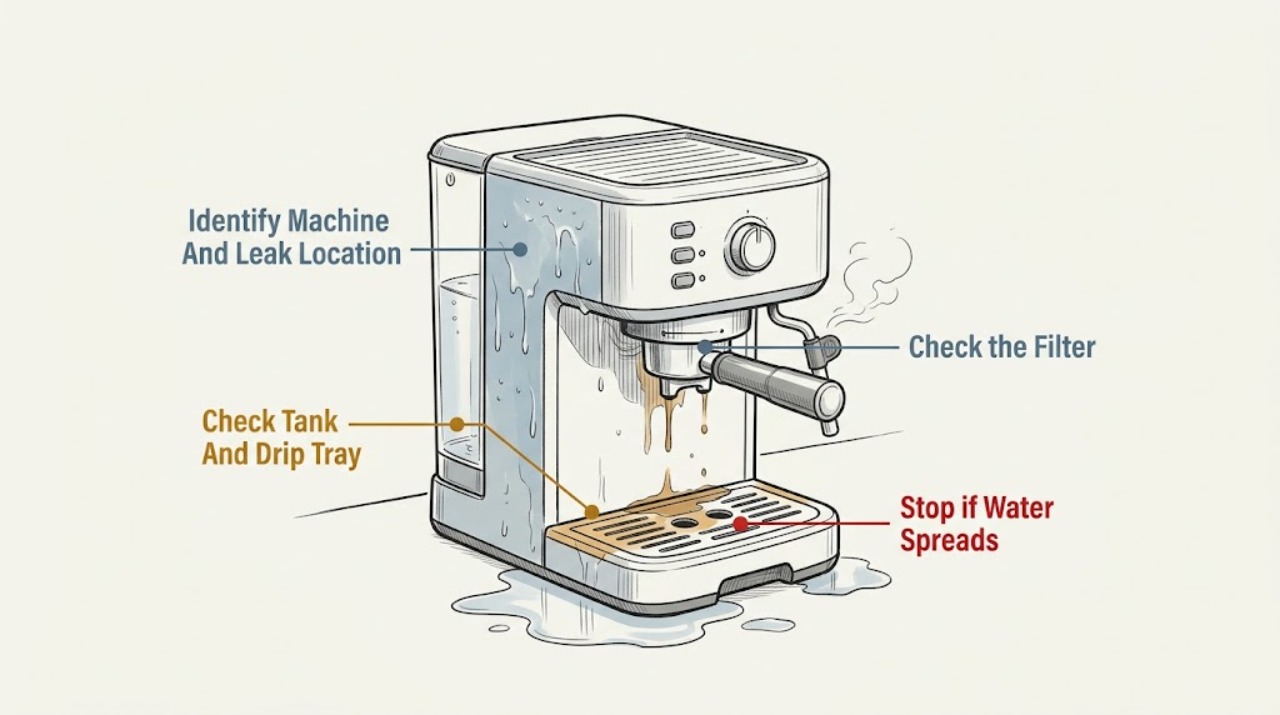
First identify the De’Longhi machine type and where the liquid begins: water tank, drip tray or grounds container, brew basket/portafilter and brew head, hot-water outlet or steam wand, or the appliance body. A full tray, tank that is cracked or not seated, loose or damaged filter-holder seal, excessive coffee grounds, a blocked filter, normal rinse water, or scale can explain some user-visible leaks.
-
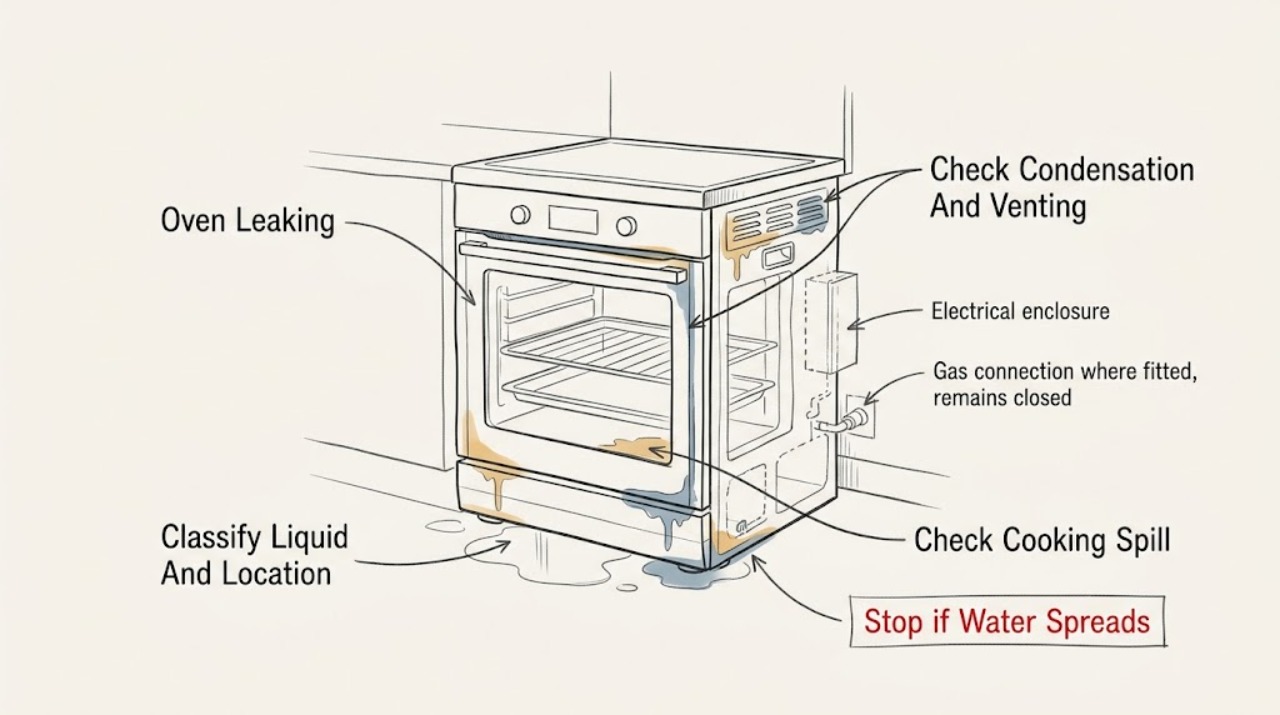
DeLonghi Oven Leaking: Identify Water, Grease, Steam, or Gas Safely
First identify what is leaking and where it starts. Clear water or droplets on the door, vent area, or cabinet during cooking can be condensation or steam, especially with wet food; DeLonghi installation guidance says condensation can occur during use and that the cavity and surrounding cabinetry need protection from frequent or excessive condensation.
-
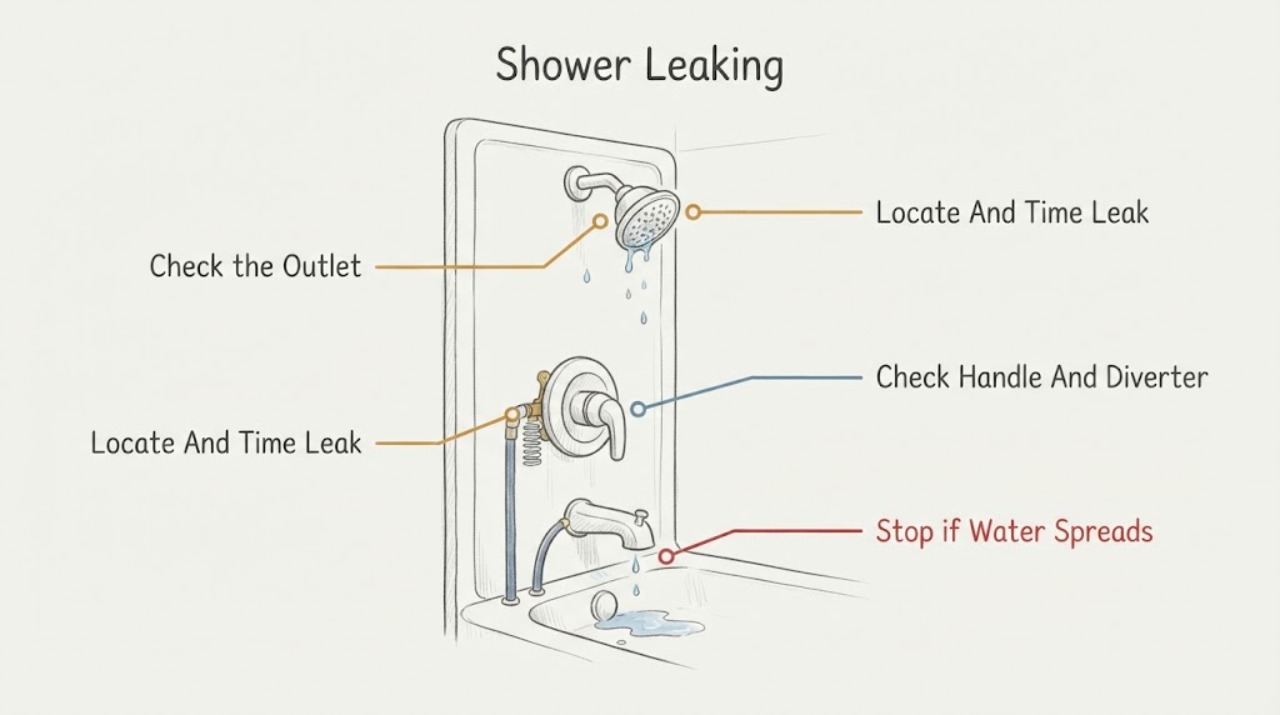
Delta Shower Leaking: What to Check and What to Do Next
First locate where the Delta shower leaks and whether it leaks only briefly after shutoff, while water is running, or continuously with the control off. A short drip from the showerhead can be the head emptying; a leak that continues long after shutoff or appears at the handle or tub spout points toward the valve cartridge or related seals.
-
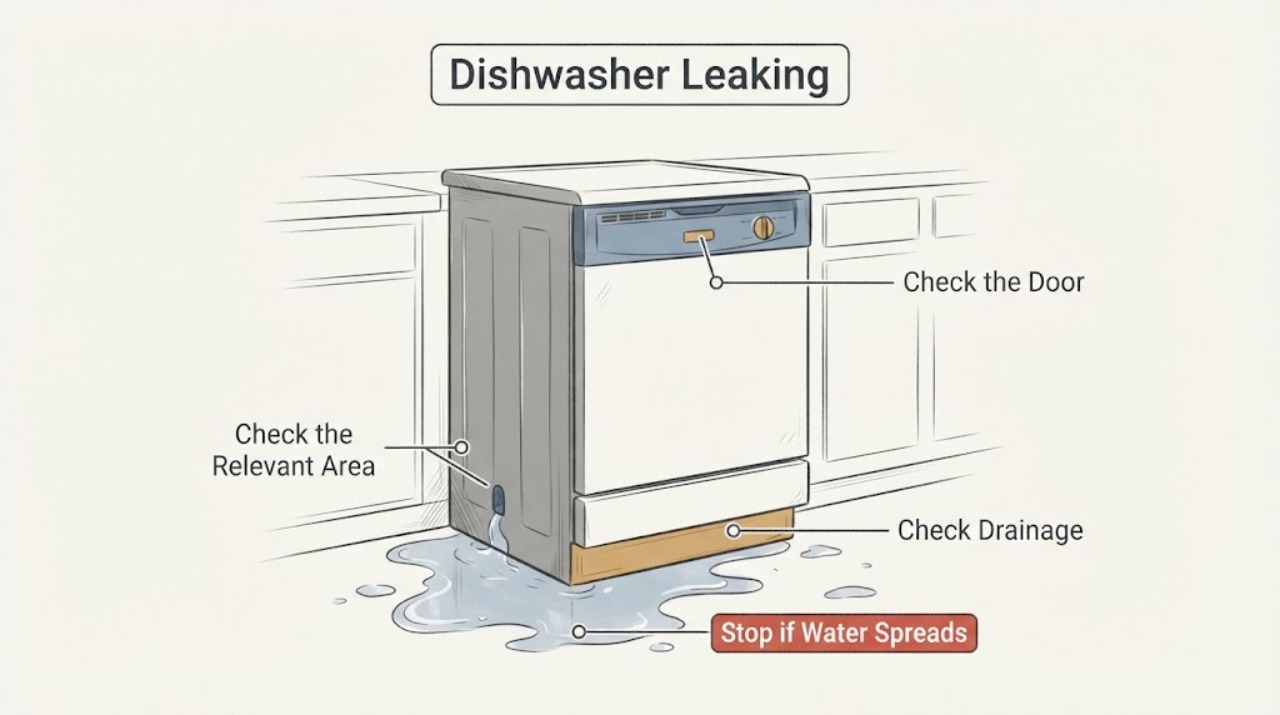
Dishwasher Leaking: Find the Water Path Before Replacing a Part
Stop a leaking dishwasher and locate where water first appears: door edge, tub bottom, inlet connection, drain route, or underneath. Whirlpool guidance points to gasket/door loading, suds, filter/drain path, leveling, and supply or drain connections. Turn off power and water when safe; persistent under-cabinet leaks, overfill, or electrical symptoms need service.
-
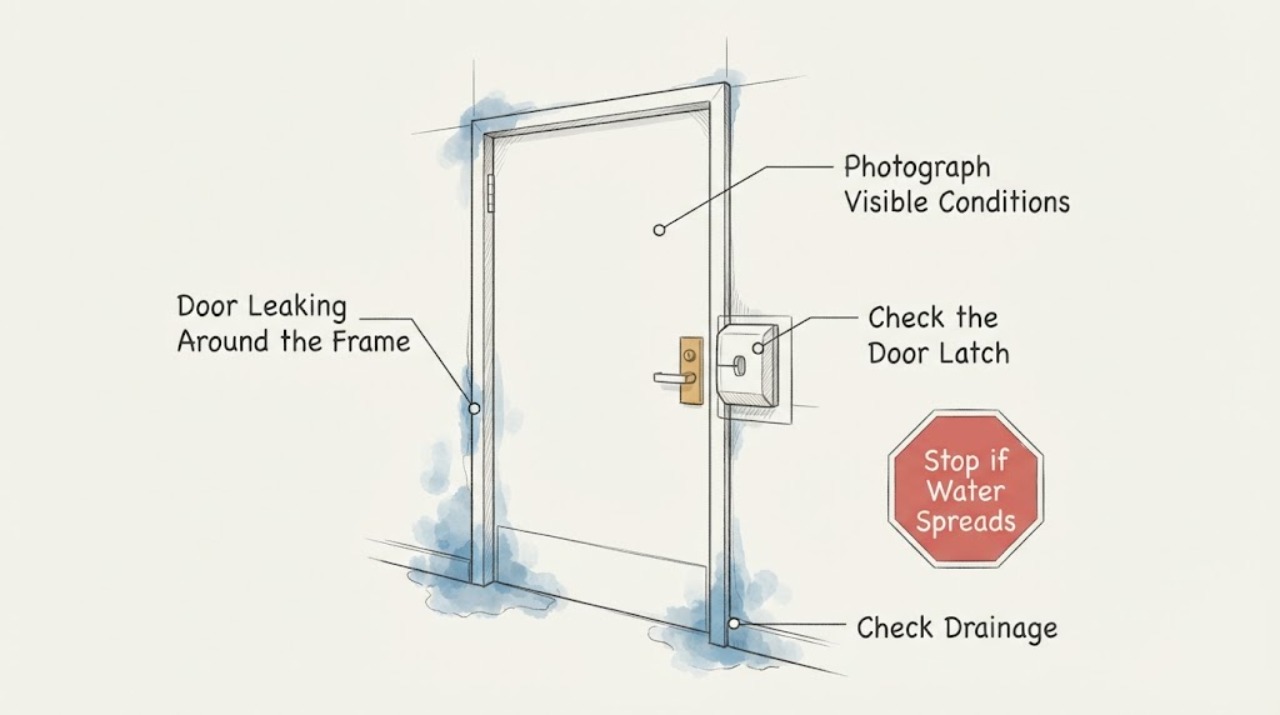
Door Leaking Around the Frame: Trace Water to the Entry Point
If water is leaking around a door frame, first determine whether it appears only during wind-driven rain, at the bottom threshold, or even in dry weather. Dry the area, photograph the stain or drip path, and inspect the exterior frame joints, head flashing, sill, threshold, and nearby roof or siding for an upper leak that is running down.
-
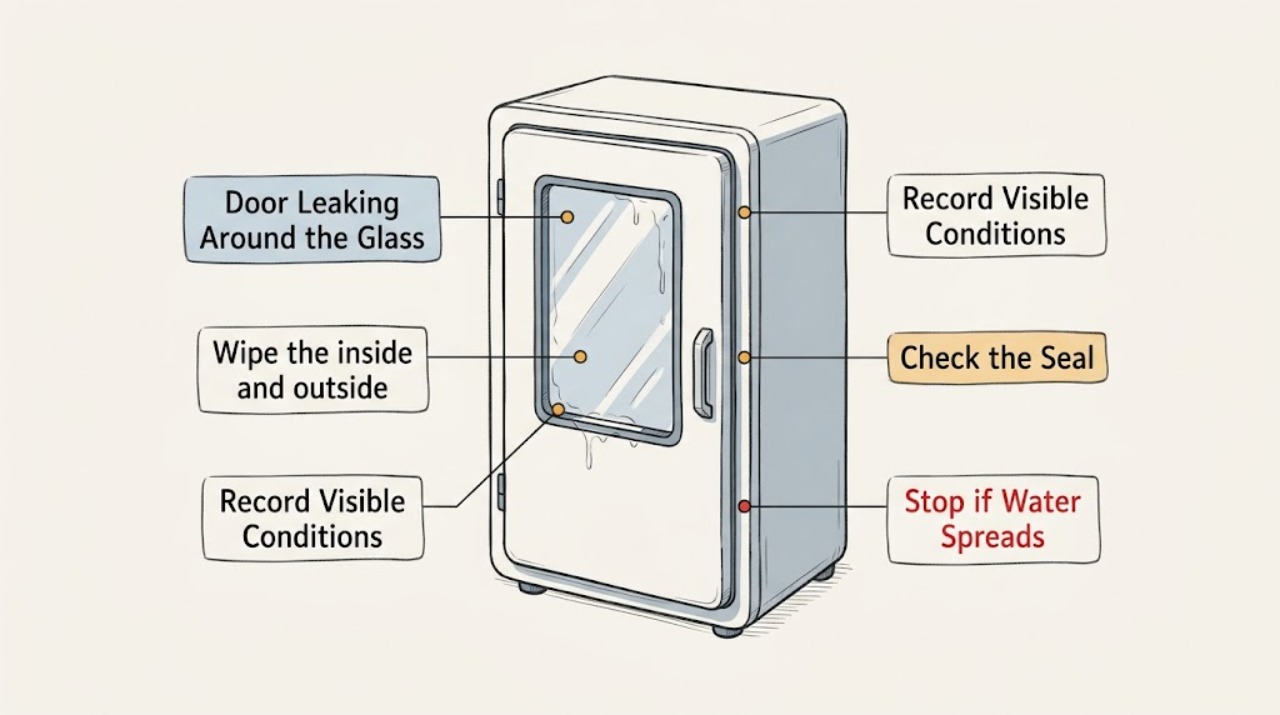
Door Leaking Around the Glass: Find the Water Path Safely
First determine whether the moisture is condensation on the glass, moisture between panes, or rain entering around the glass, frame, sill, or wall opening. Wipe the surface dry, observe where moisture returns during a controlled weather event, and inspect the interior edge, weatherstrip, drainage openings, and nearby trim without removing the glass or door frame.
-
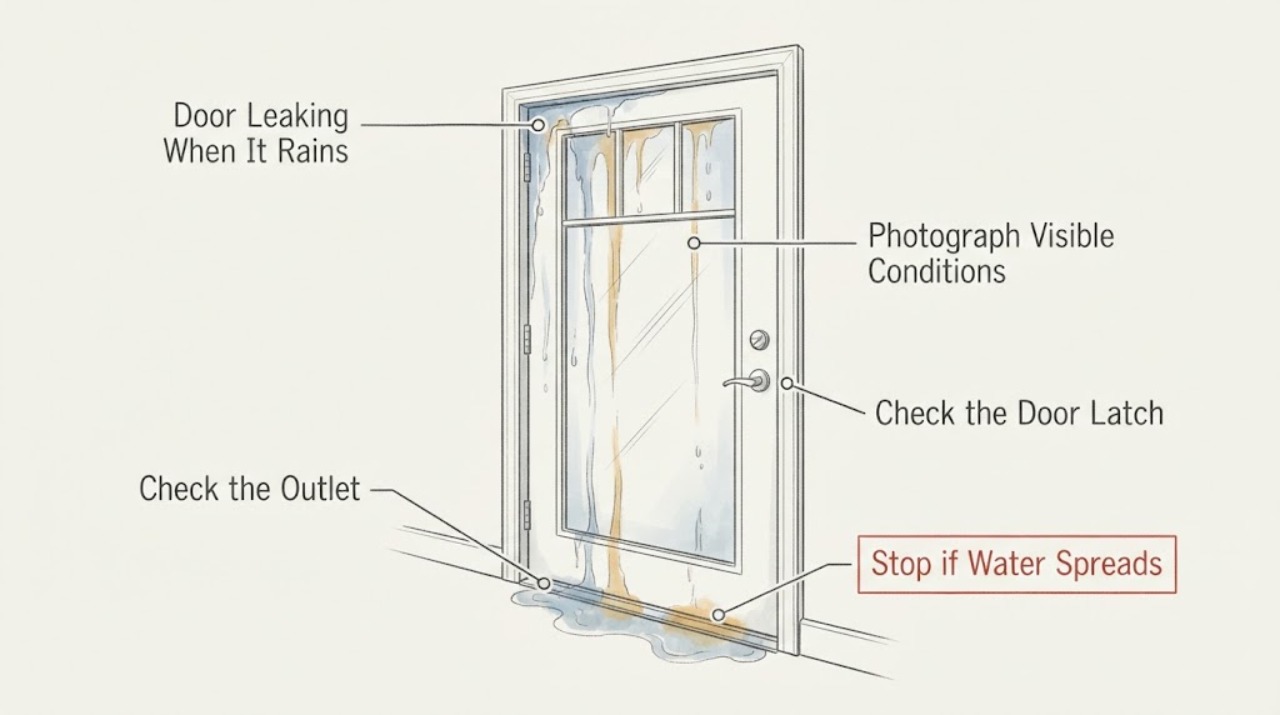
Door Leaking When It Rains: Trace the Glass, Sill, and Flashing
Do not start with caulk. First stay off ladders and exterior surfaces during rain, wind, or lightning, and keep water away from electrical outlets and equipment.
-
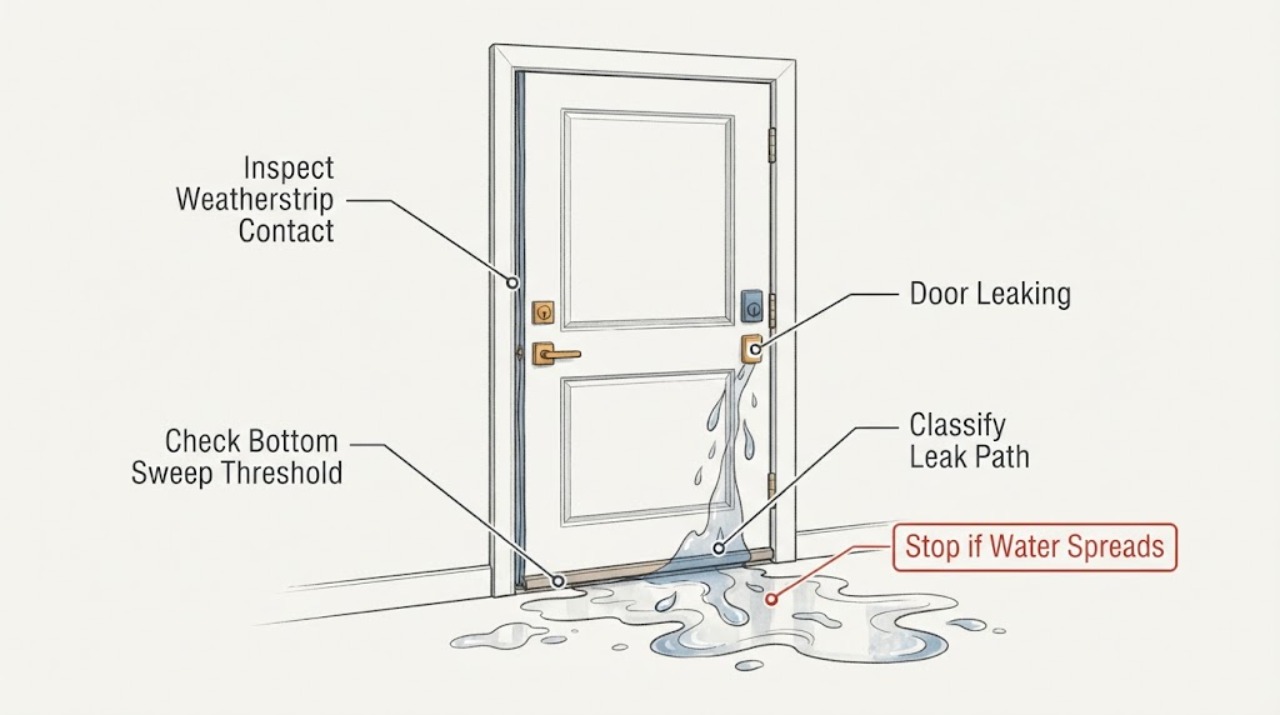
Door Leaking: Check the Weatherstripping Before Replacing It
First determine whether “leaking” means outside air, rainwater, or water from a plumbing or condensation source. Weatherstripping is intended to close air gaps around a moving exterior door; it is a likely match when you see daylight, feel a draft, or find a damaged strip that no longer contacts the jamb.
-
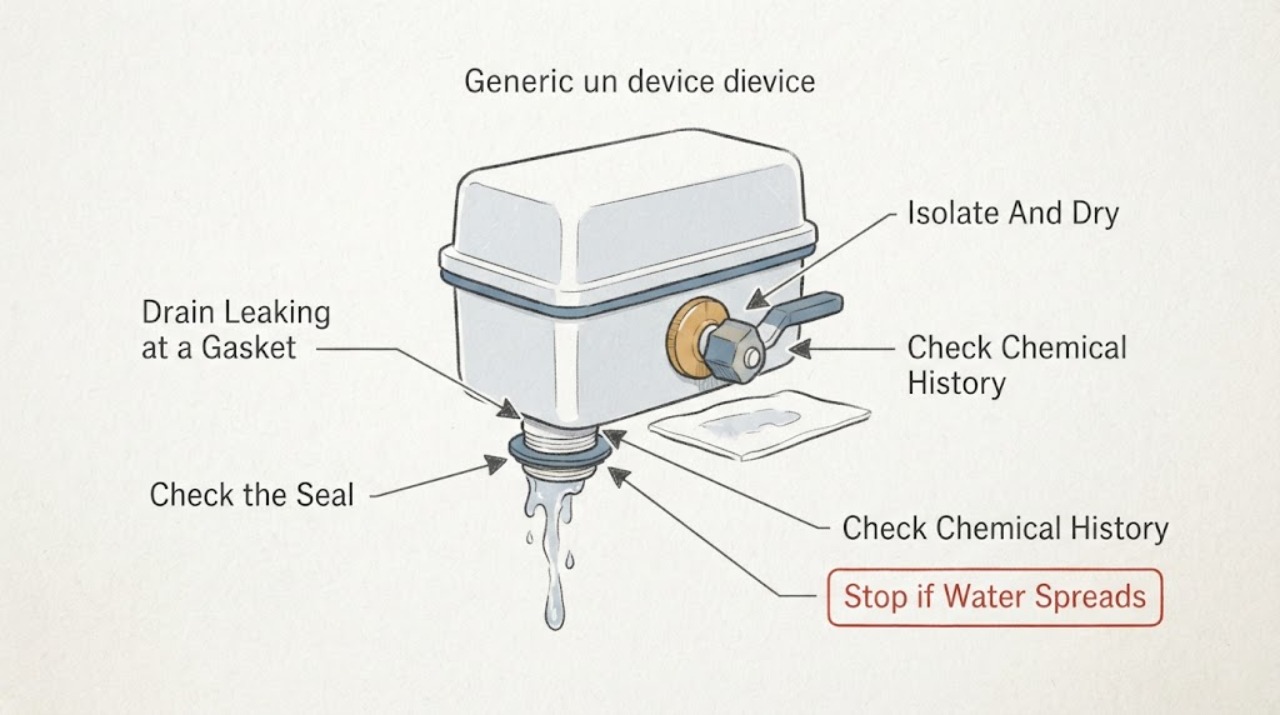
Drain Leaking at a Gasket: Find the Joint Before Replacing the Seal
A leaking drain gasket is possible, but the wet gasket may be downstream from the real source. First stop unnecessary water use, dry the area, and identify the first point that becomes wet during a brief controlled observation.
-
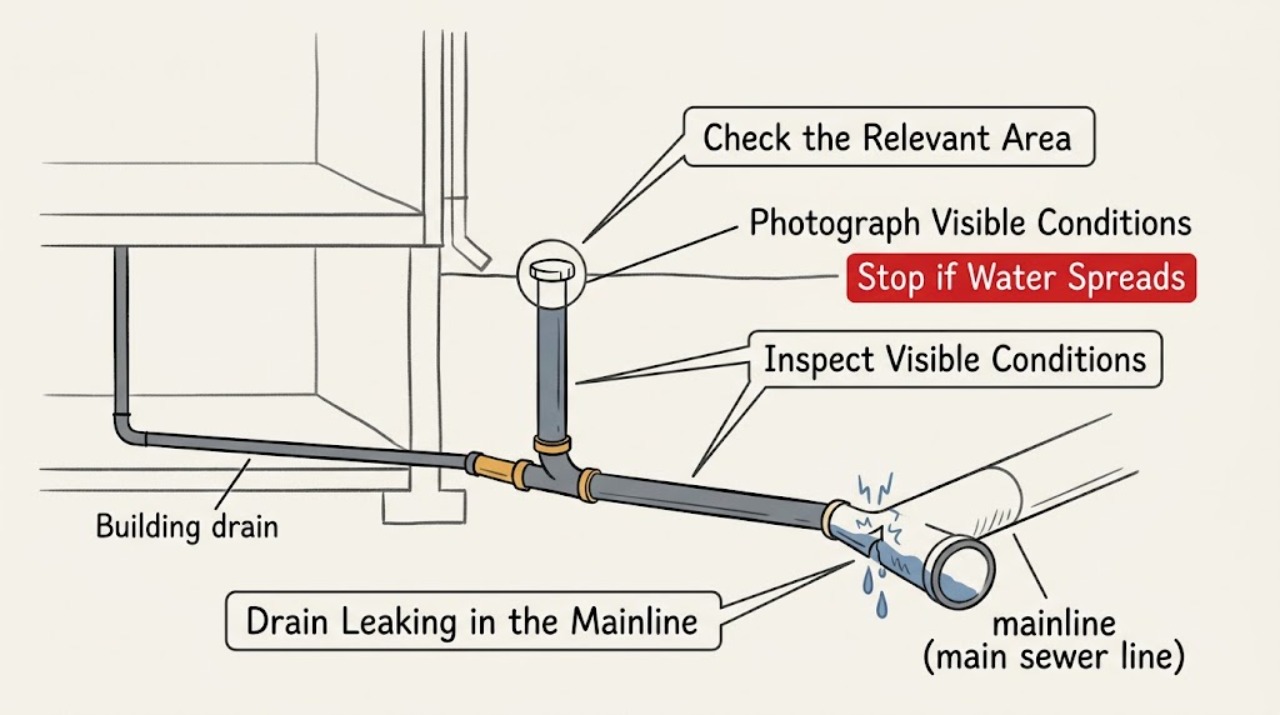
Drain Leaking in the Mainline: Separate a Private Lateral Leak From a Public Sewer Problem
A leak described as being in the mainline is not a sink-trap repair. First reduce or stop water use if wastewater is backing up, keep people and pets away from sewage, and do not open a pressurized cleanout, pour chemicals into the line, dig, or enter an excavation.
-
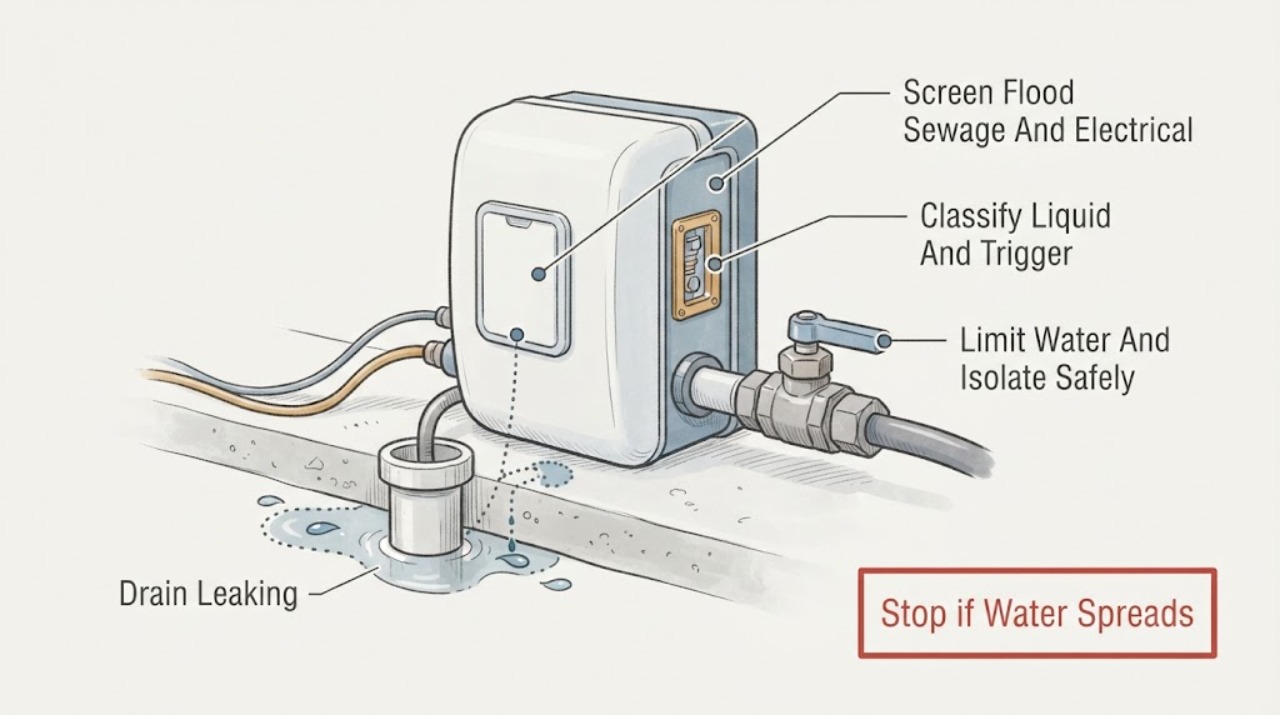
Drain Leaking: Locate the Line, Limit Damage, and Know When to Call a Plumber
A leaking drain line can be a loose visible joint, a cracked trap or pipe, a backed-up drain forcing water out, or a concealed leak in a wall, floor, or ceiling. First stop or reduce the fixture use that makes the leak worse, identify whether the liquid is clean water or wastewater, and keep people away from standing water near electricity.
-
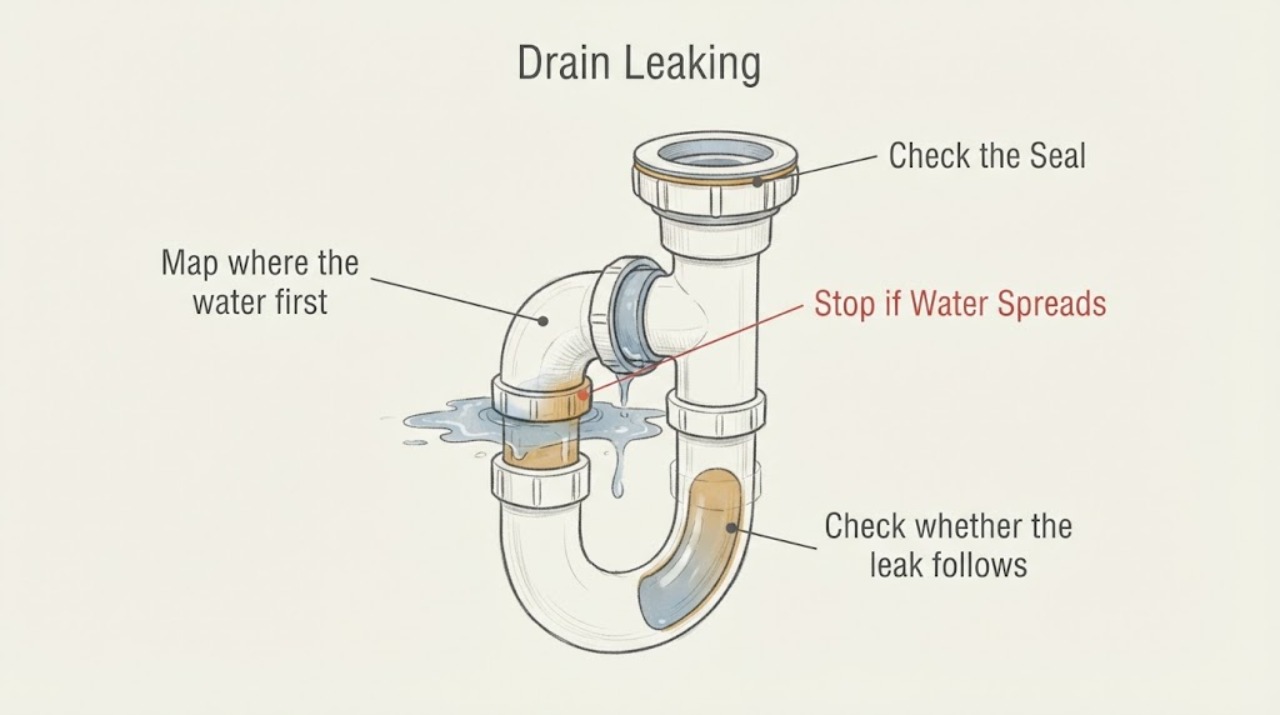
Drain Leaking: What to Check and What to Do Next
First find the exact point where the water appears and whether it happens only while the drain is carrying water. Dry the area, run a short controlled test, and watch the drain opening, trap joints, wall connection, and nearby surfaces without loosening anything.
-
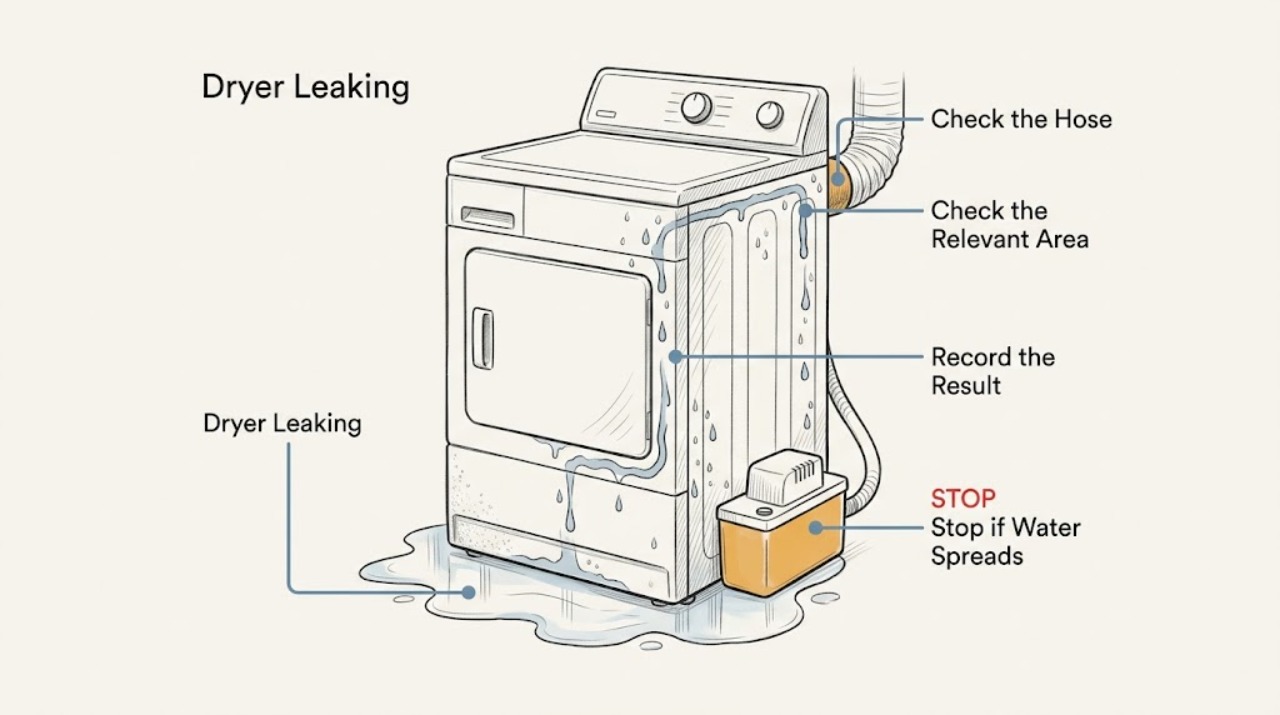
Dryer Leaking: Identify the Water Path Before Repair
Stop the dryer and find the first place water appears before choosing a repair path. A vented dryer sends hot, moist air through an exhaust duct; a kinked or restricted duct can collect water or cause condensation around the door.
-
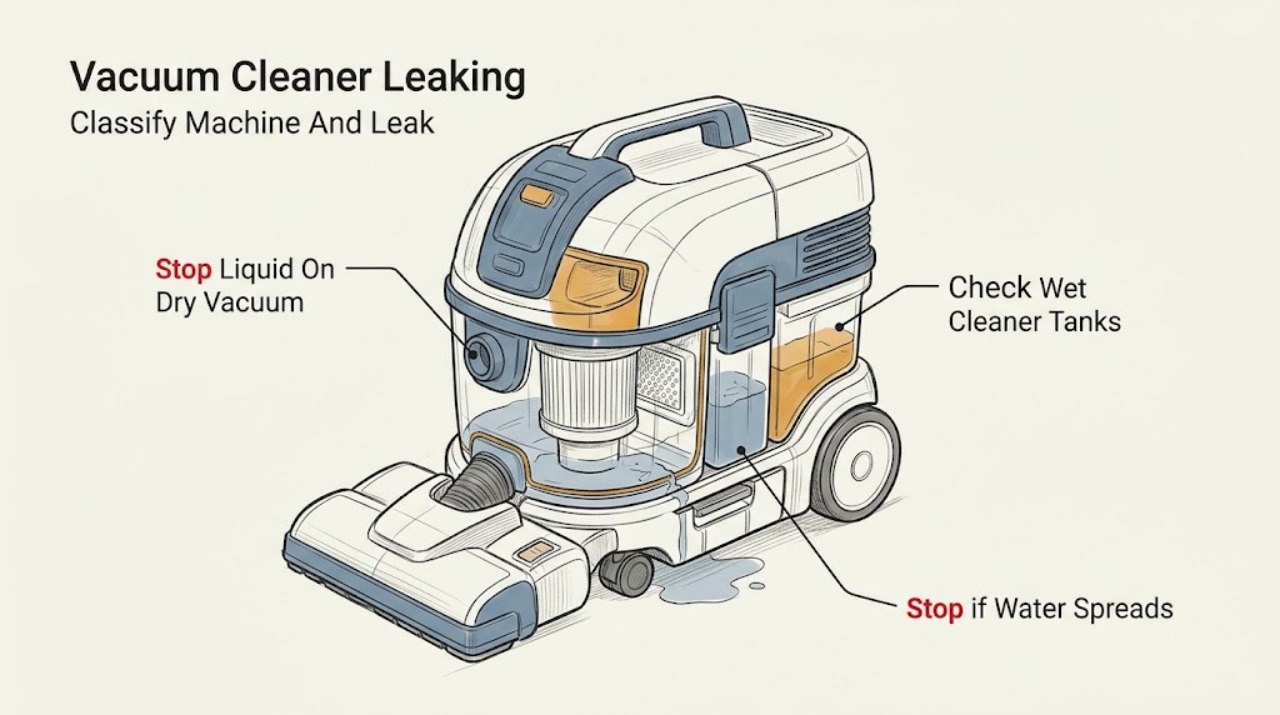
Dyson Vacuum Cleaner Leaking: Identify the Machine and Liquid Path First
“Dyson vacuum leaking” is not one diagnosis: Dyson supports dry vacuums, wet and dry vacuums, and dedicated wet cleaners, so first identify the model and whether the leak is dry dust/debris or liquid. A conventional dry Dyson manual says not to use the machine on wet surfaces or to pick up water; if liquid is coming from or has entered a dry vacuum, switch it off, unplug it or remove it from its charger, keep hands dry, and do not restart it.
-
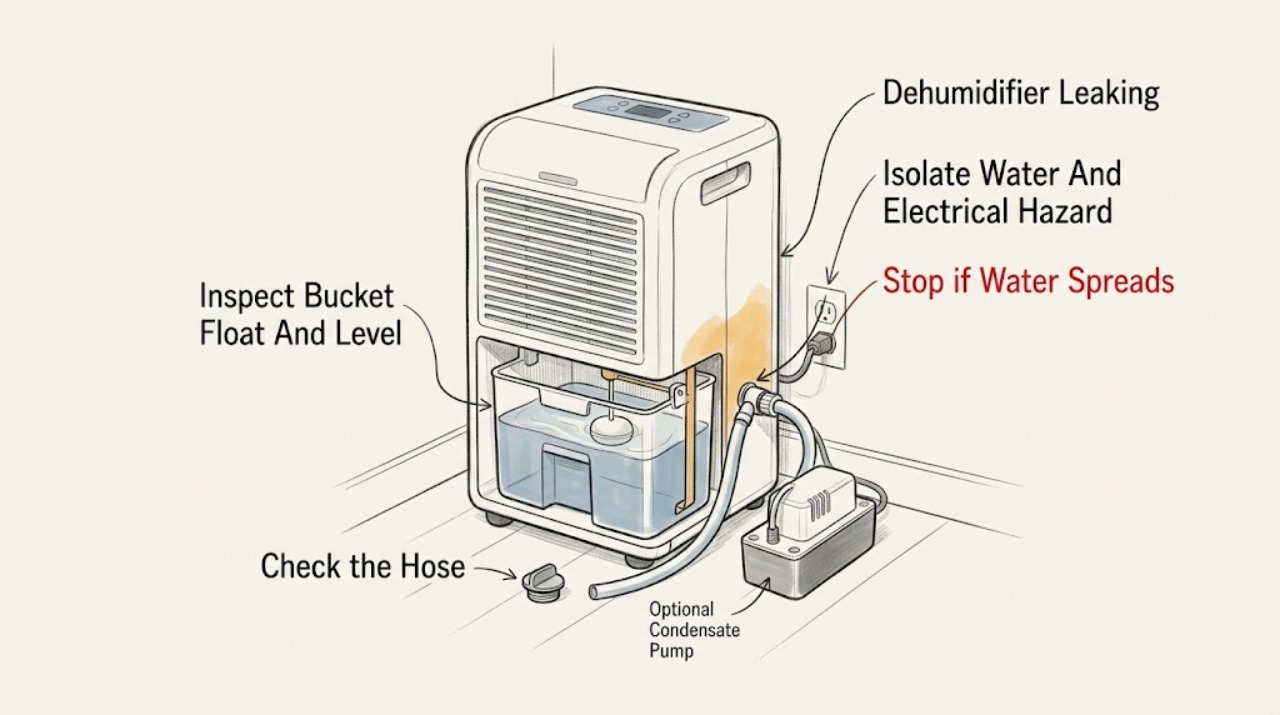
Electrolux Dehumidifier Leaking: Check the Bucket and Drain Route Safely
Stop the Electrolux dehumidifier if water is near the plug, outlet, cord, or the unit's electrical base; do not touch wet electrical parts. If the area is dry and safe to inspect, first identify whether water is coming from the bucket, the continuous-drain connection, the pump hose, or the base.
-
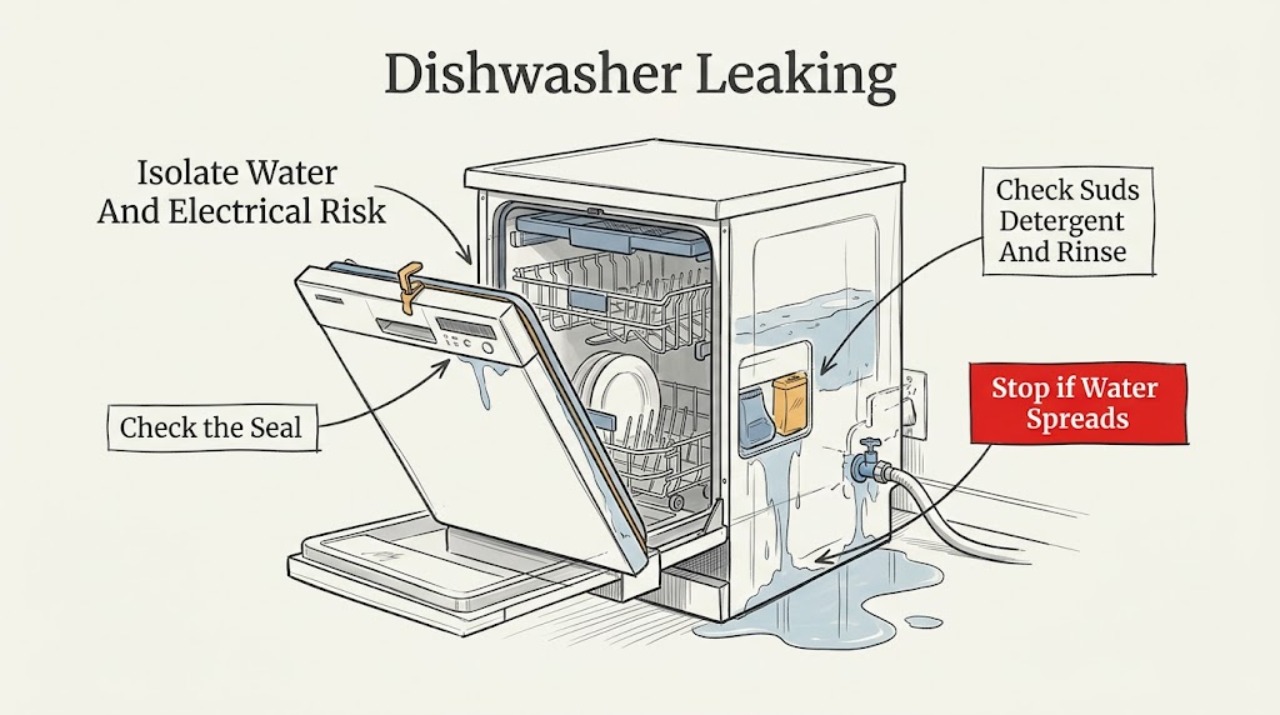
Electrolux Dishwasher Leaking: Door, Suds, Hoses, and Safe Checks
Stop the cycle if water is spreading toward a receptacle, cord, junction, or other electrical part; do not touch wet electrics. If it is safe, stop the dishwasher, close the household water supply, and remove standing water from the accessible floor area.
-
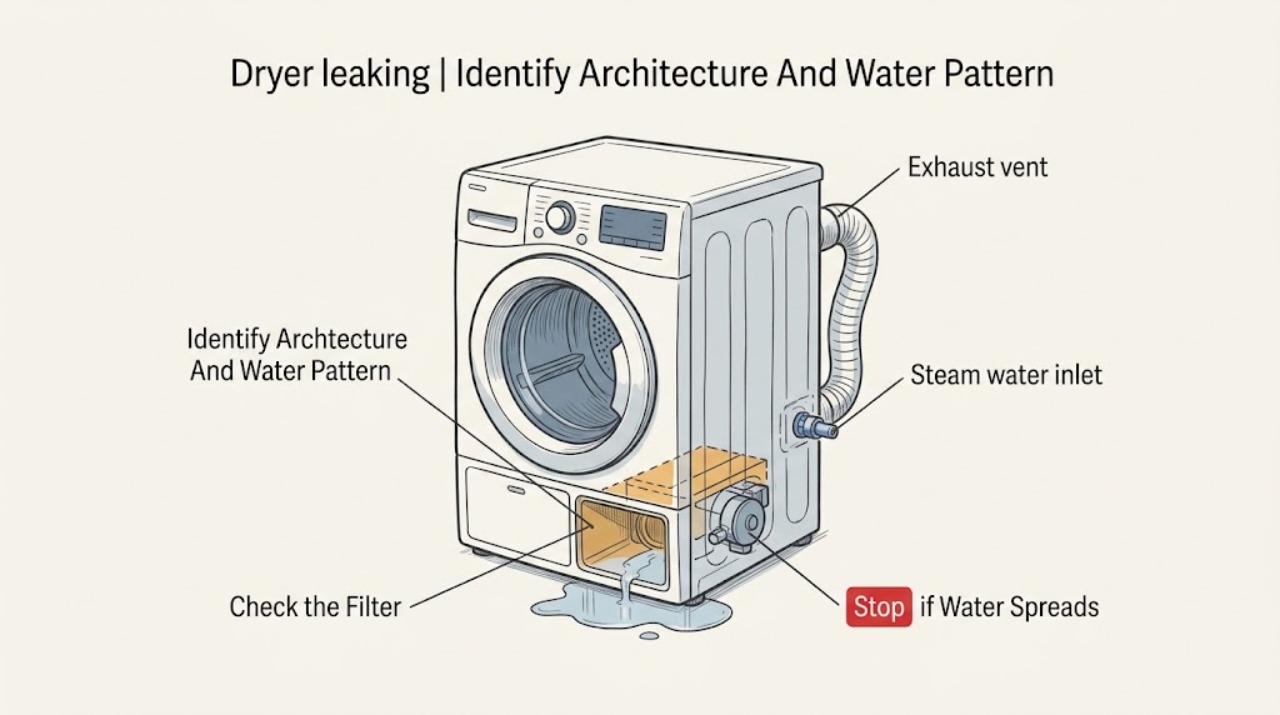
Electrolux dryer leaking: identify the dryer type before checking the water path
First identify whether your Electrolux dryer is a heat-pump or condenser model, a vented model, or a dryer with a Steam option. A heat-pump or condenser dryer that leaks underneath may have a blocked condensate pump, clogged filter or condenser, incorrect leveling, or a kinked direct-drain hose; a small amount of water in the tank after drying makes a blocked condensate pump more concerning and requires service.
-
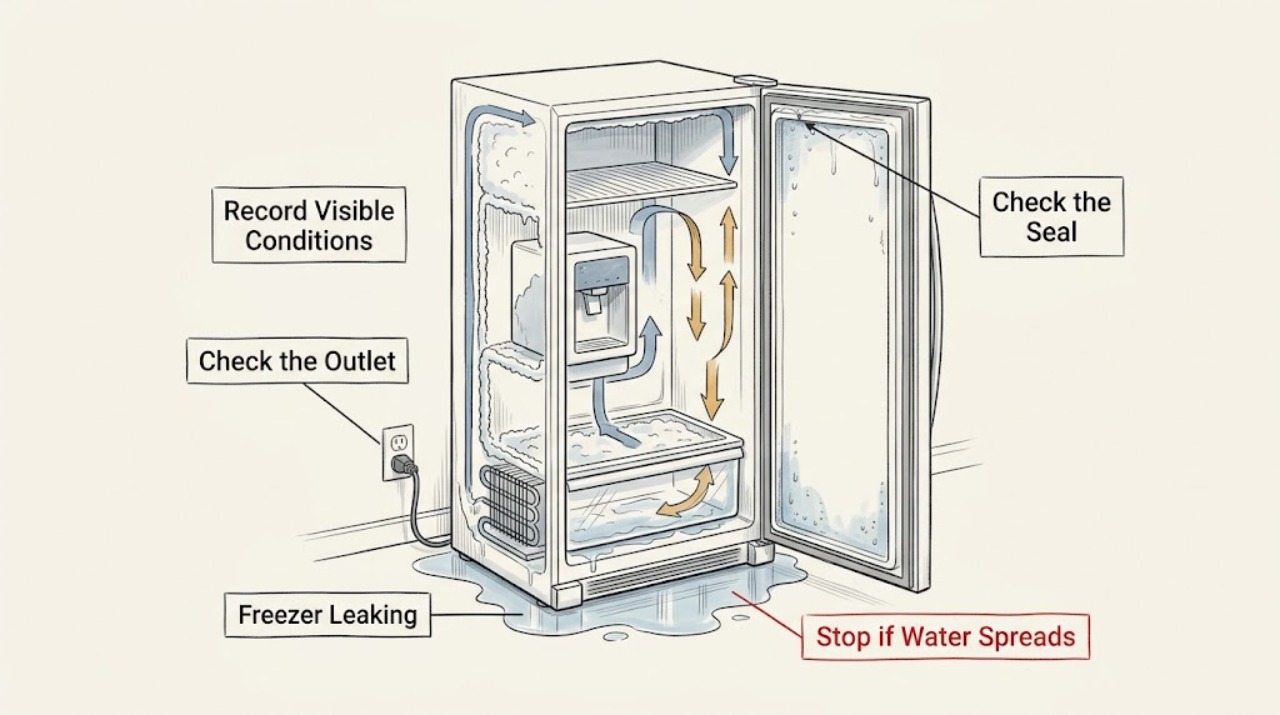
Electrolux Freezer Leaking: Find the Water Source, Check the Seal, and Stop Frost Melt
Protect the floor and keep water away from electrical connections, then determine whether the water is inside the cabinet, at the door or lid, on the outside wall, or beneath the freezer. A door or lid left slightly open, a dirty or poorly fitted gasket, blocked airflow, and frost buildup can let warm air enter and create conditions for frost to melt or moisture to form.
-
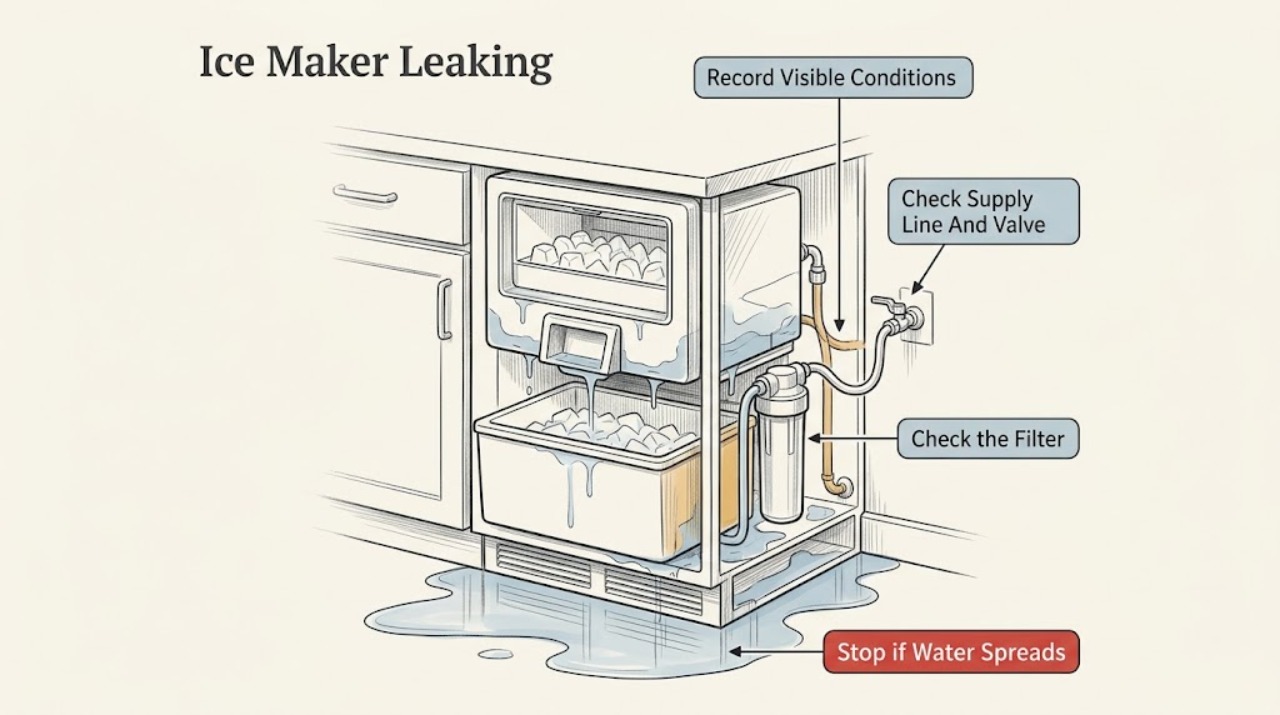
Electrolux Ice Maker Leaking
First locate when and where the water starts: at the rear supply connection or valve, filter housing, dispenser chute, ice bin, underside of the ice maker, or inside/under the cabinet. Electrolux’s model-specific refrigerator guidance identifies loose or kinked water lines, a filter that is not seated or is clogged/cracked, air after installation or a filter change, melted/refrozen ice, and a restricted supply as different causes.
-
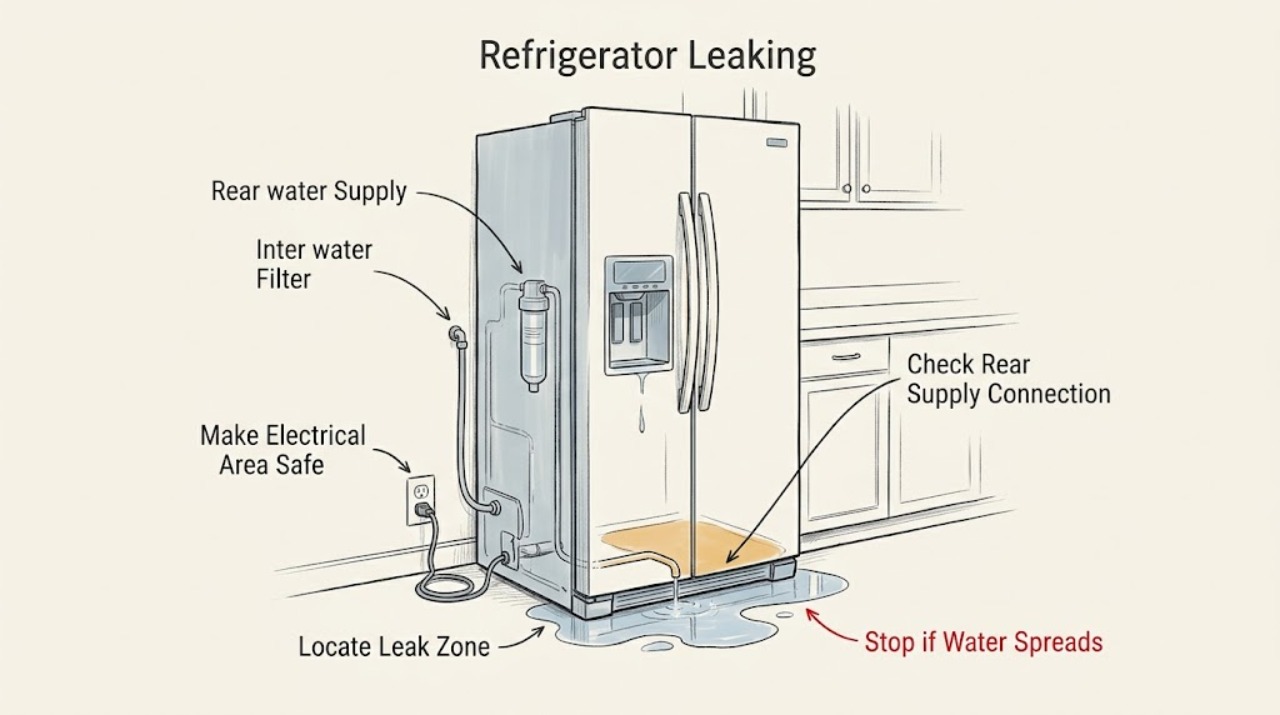
Electrolux Refrigerator Leaking
First protect the floor and electricity, then locate whether water is coming from a rear supply connection, the filter area, the dispenser/chute, the ice-maker area, a door edge, or underneath the cabinet. Do not touch a wet plug, outlet, control, or cord.
-
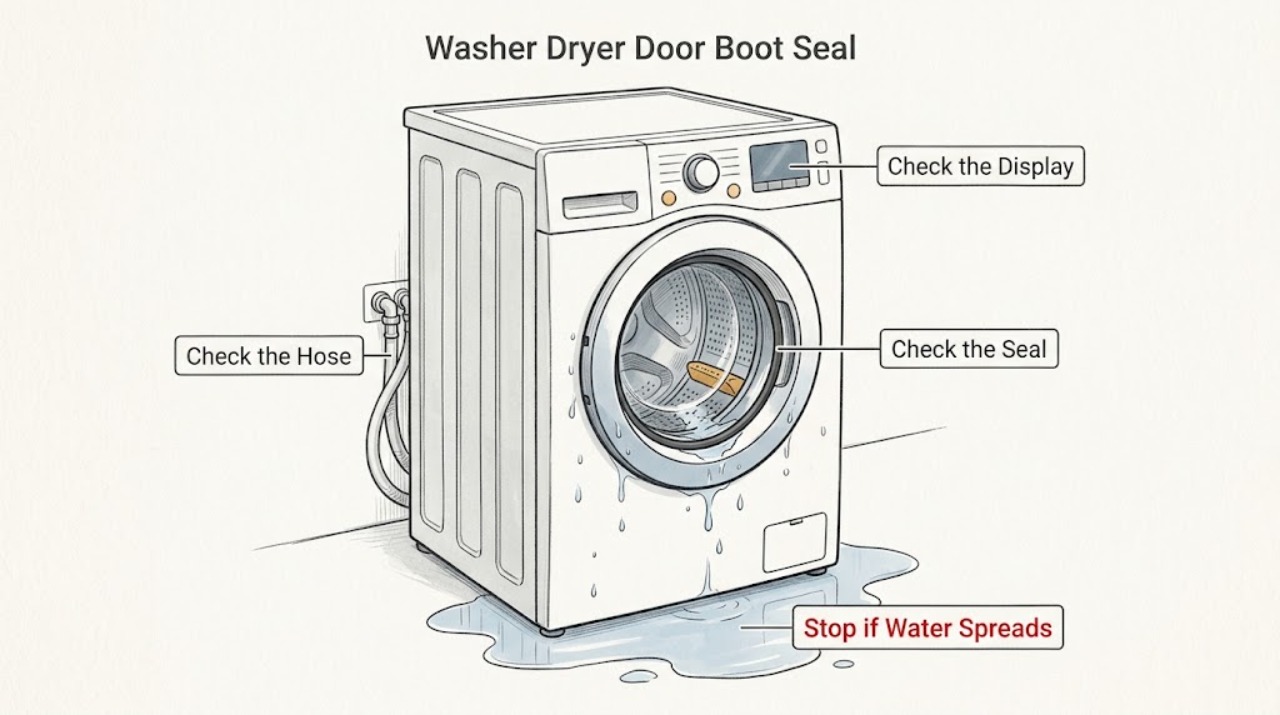
Electrolux Washer Dryer Door Boot Seal Leaking: What to Check and What to Do Next
Stop the Electrolux washer dryer, keep the door area safe, and turn off the water supply before inspecting a door boot seal leak. With power disconnected and the drum stopped, look through the entire rubber fold for trapped clothing, coins, hair, detergent residue, tears, cracks, holes, looseness, or deformation; also check that laundry is not caught between the seal and glass and that the drum is not overloaded.
-
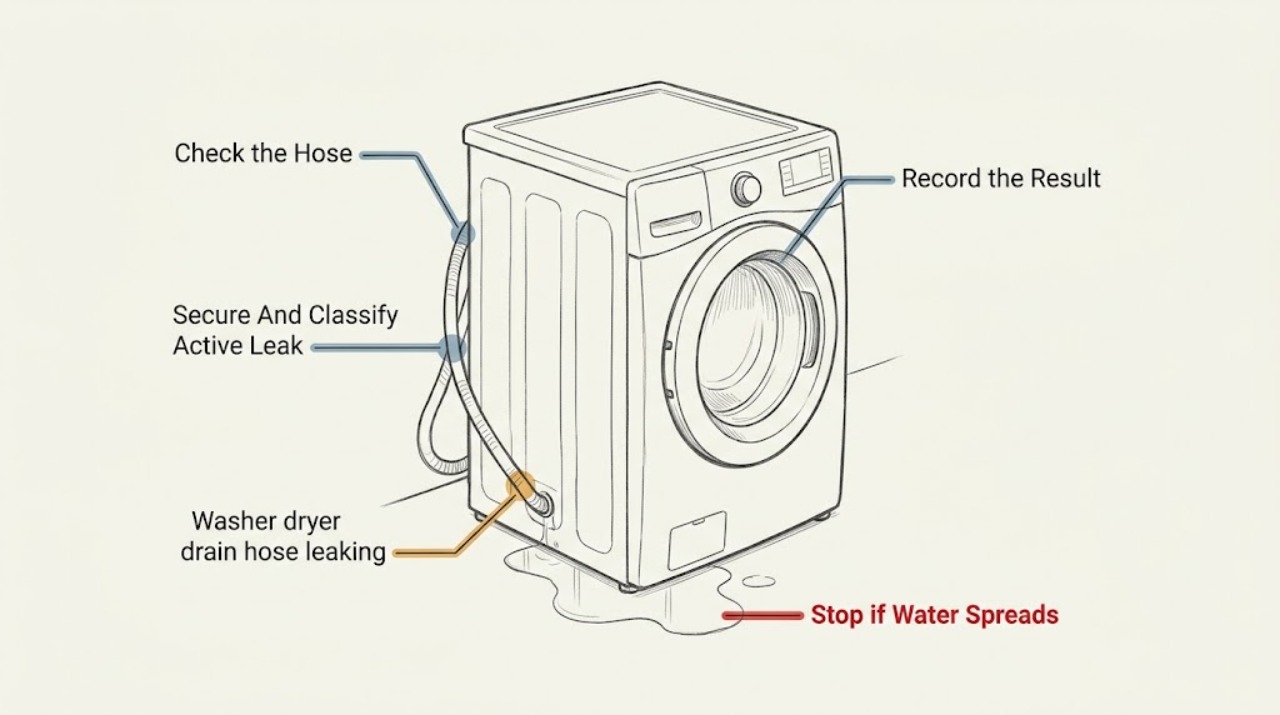
Electrolux washer dryer drain hose leaking: What to Check and What to Do Next
If an Electrolux washer dryer is leaking from the drain hose, stop the cycle and keep the appliance off until you can identify the first wet point from a safe, dry position. Turn off the water supply and isolate power only from a safe dry location; never touch a wet plug or stand in water.
-
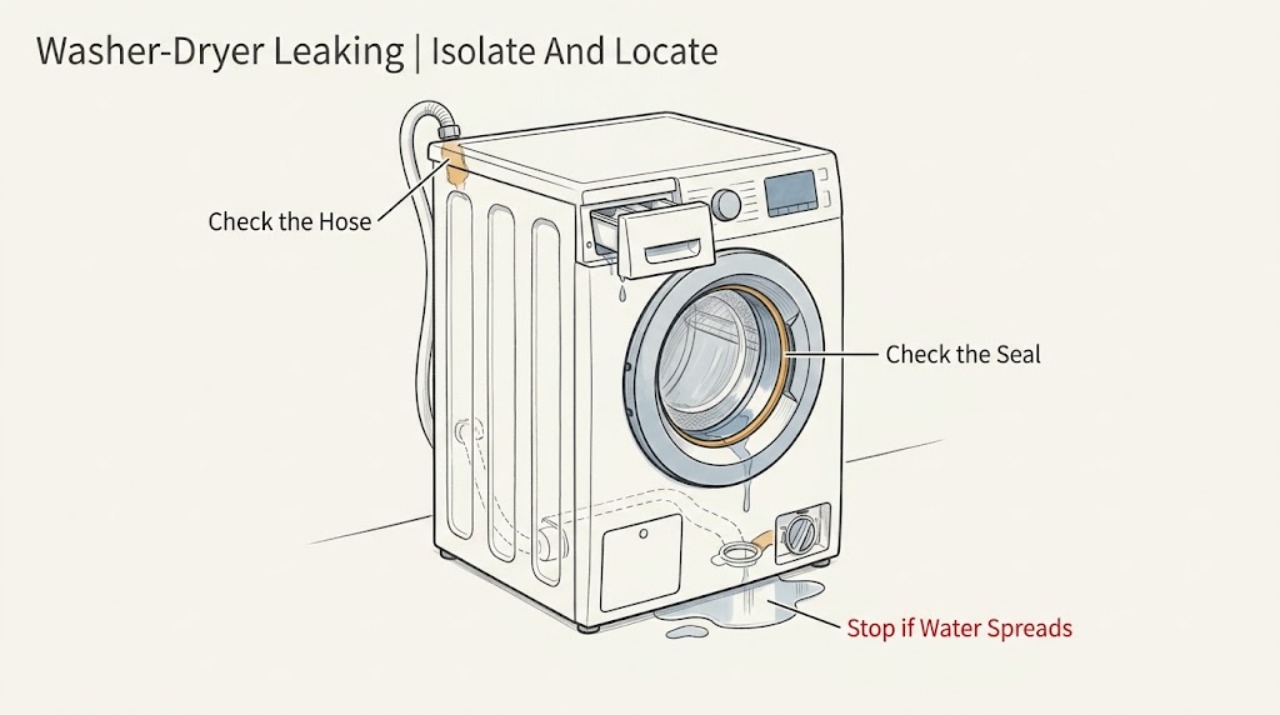
Electrolux Washer-Dryer Leaking: Find the Water Path Safely
If an Electrolux washer-dryer is leaking, stop the cycle, disconnect power, and turn off the water supply before checking where the water starts. Inspect the inlet hose and tap connections, the door seal, detergent drawer, drain hose or filter, and—if the leak occurs only during drying—the condensate path.
-
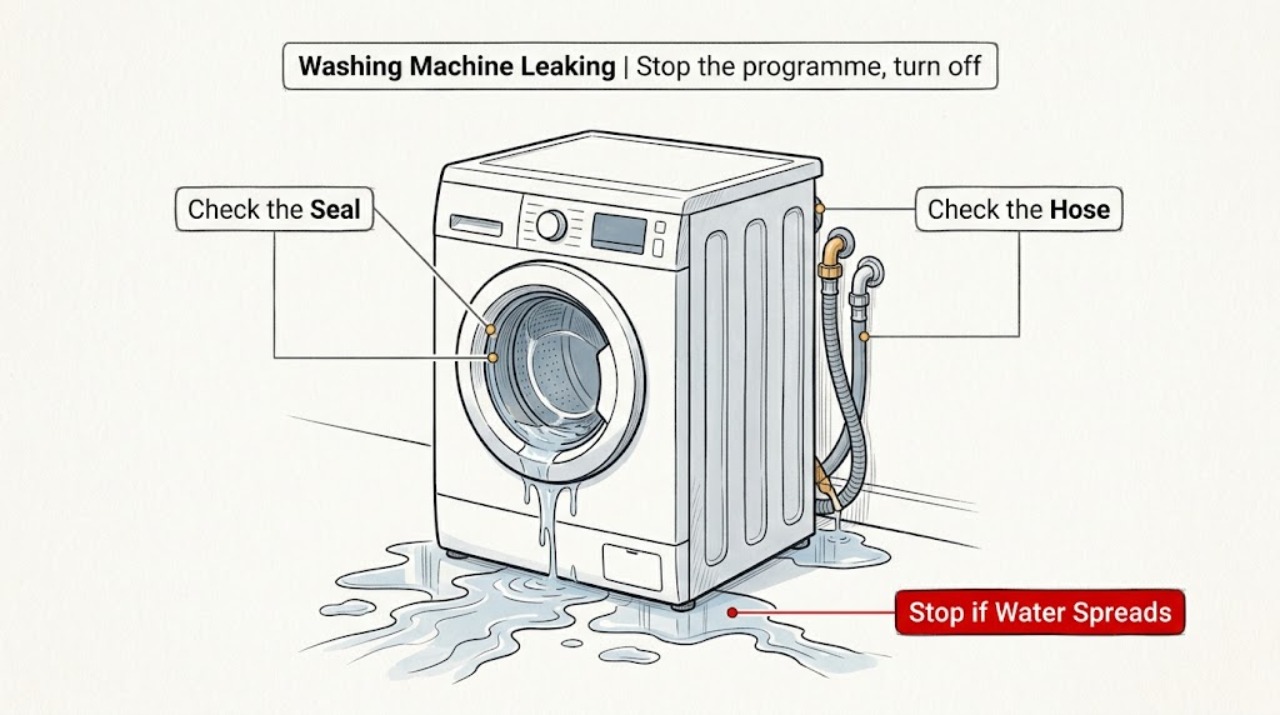
Electrolux Washing Machine Leaking
When an Electrolux washing machine is leaking, stop the cycle, turn off the water supply, and disconnect power when it is safe. Trace the first wet point: a tap or inlet connection, drain hose, detergent drawer, door seal, filter area, or water from inside the cabinet each leads to a different check.
-
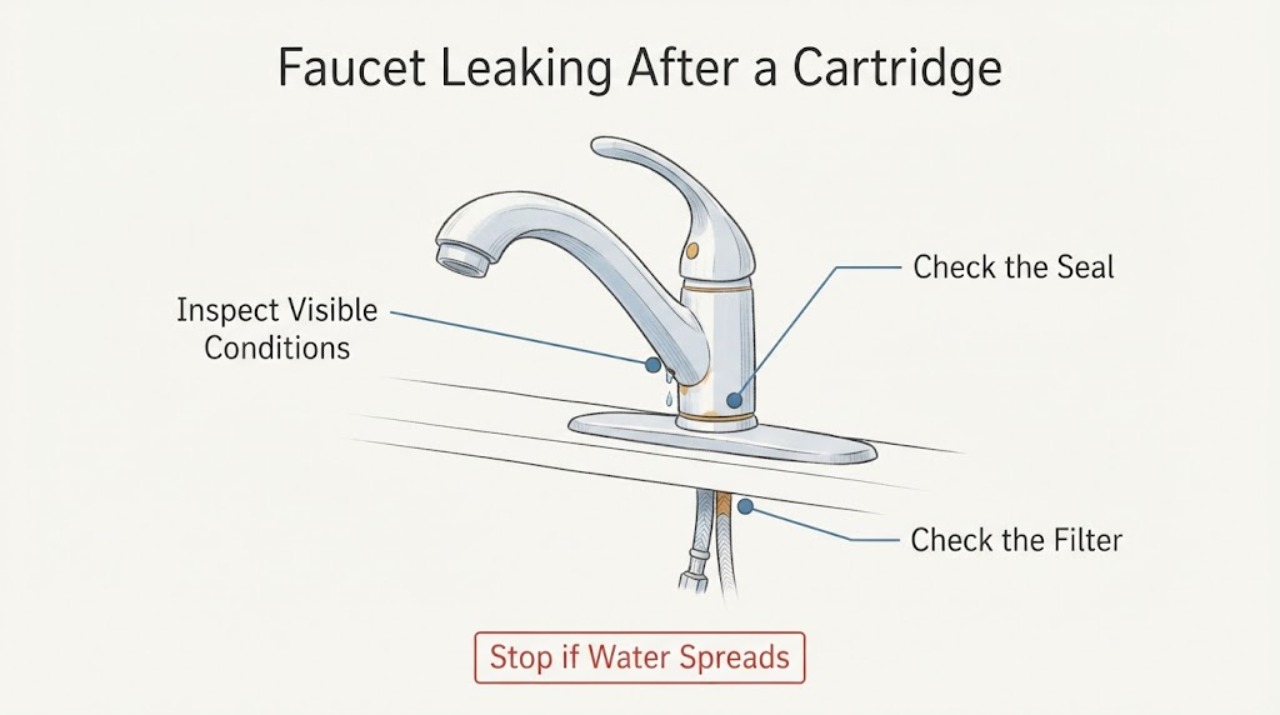
Faucet Leaking After a Cartridge Change: Find the First Wet Point
First turn off the affected hot and cold supplies from clearly identified, dry-to-reach valves, dry the faucet and cabinet, and find the first wet point during one short, supervised observation. A leak only while the faucet is open can be an incorrectly seated cartridge seal, retainer, aerator, spout O-ring, or connection; a drip that continues with the handle closed points toward a valve, cartridge, housing, supply, or pressurized connection.
-
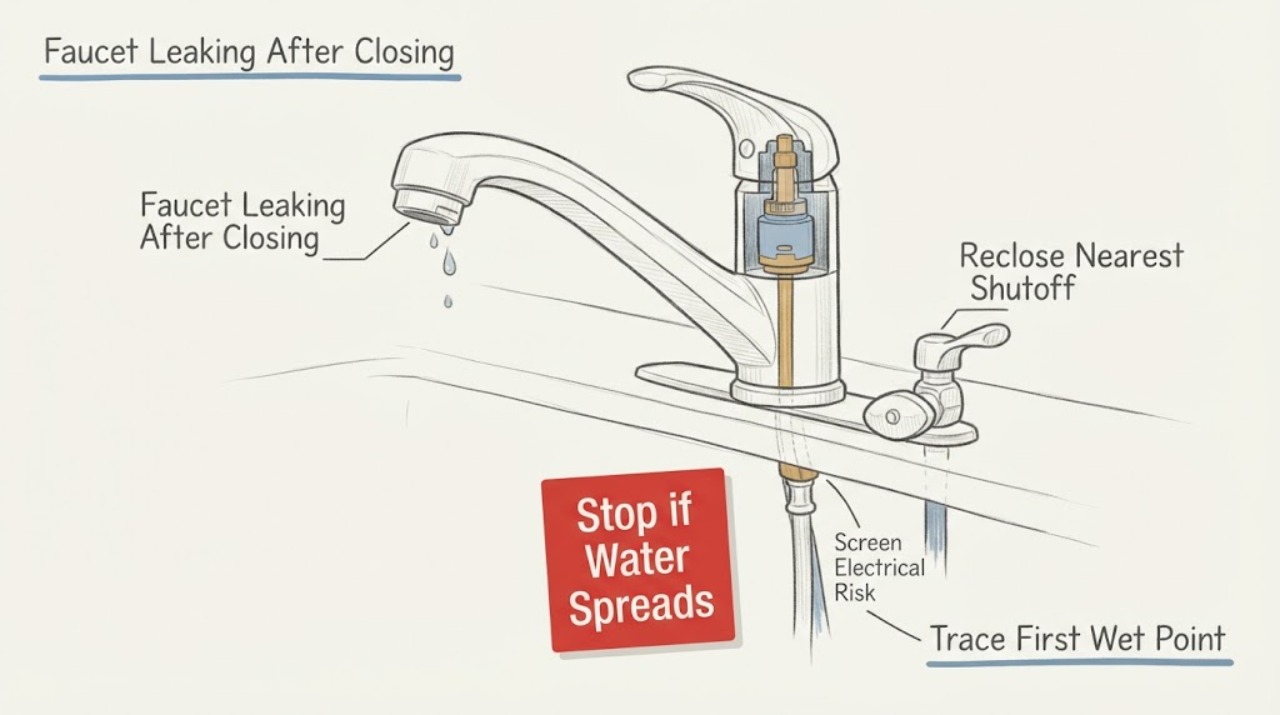
Faucet Leaking After Closing and Opening the Shutoff: Find the First Wet Point
If a faucet starts leaking after its shutoff was closed and reopened, first close the nearest shutoff again without forcing it and identify the first wet point. A leak at the shutoff stem, valve body, or threaded connection is different from a leak at the supply hose, faucet base, handle, or spout.
-
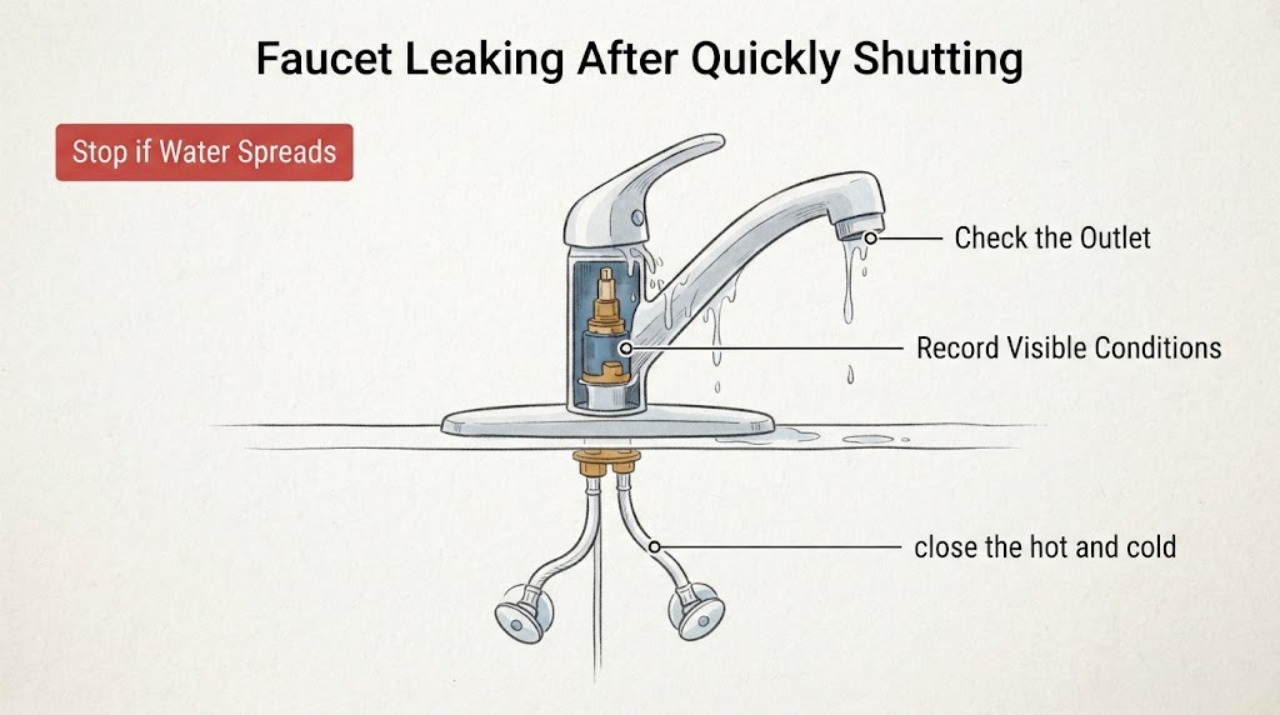
Faucet Leaking After Quickly Shutting Hot Water at the Kitchen Faucet
Quickly closing the hot side of a kitchen faucet can produce a short water-hammer bang without causing a leak, so first separate sound from actual wetness. If water remains at the spout, handle, base, or a supply connection, close the local water valve under the sink from a dry position; use the main valve if the local valves fail.
-
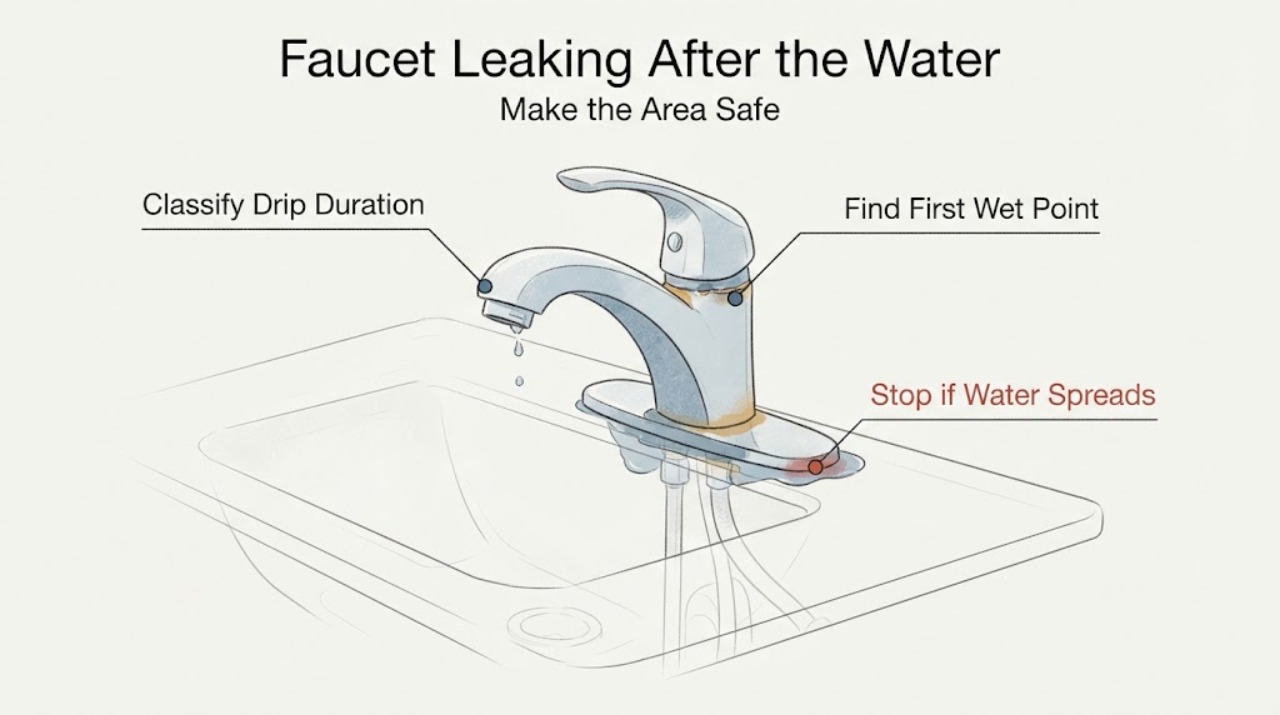
Faucet Leaking After the Water Is Shut Off: Find the First Wet Point
A few drops immediately after a faucet is closed can be residual water in the spout or outlet, but a drip that continues, restarts, or appears at the handle, base, supply connection, wall, or cabinet needs a leak check. Keep the condition exactly as reported—after water flow is terminated e—and first determine whether water is still being supplied or is only draining from the fixture.
-
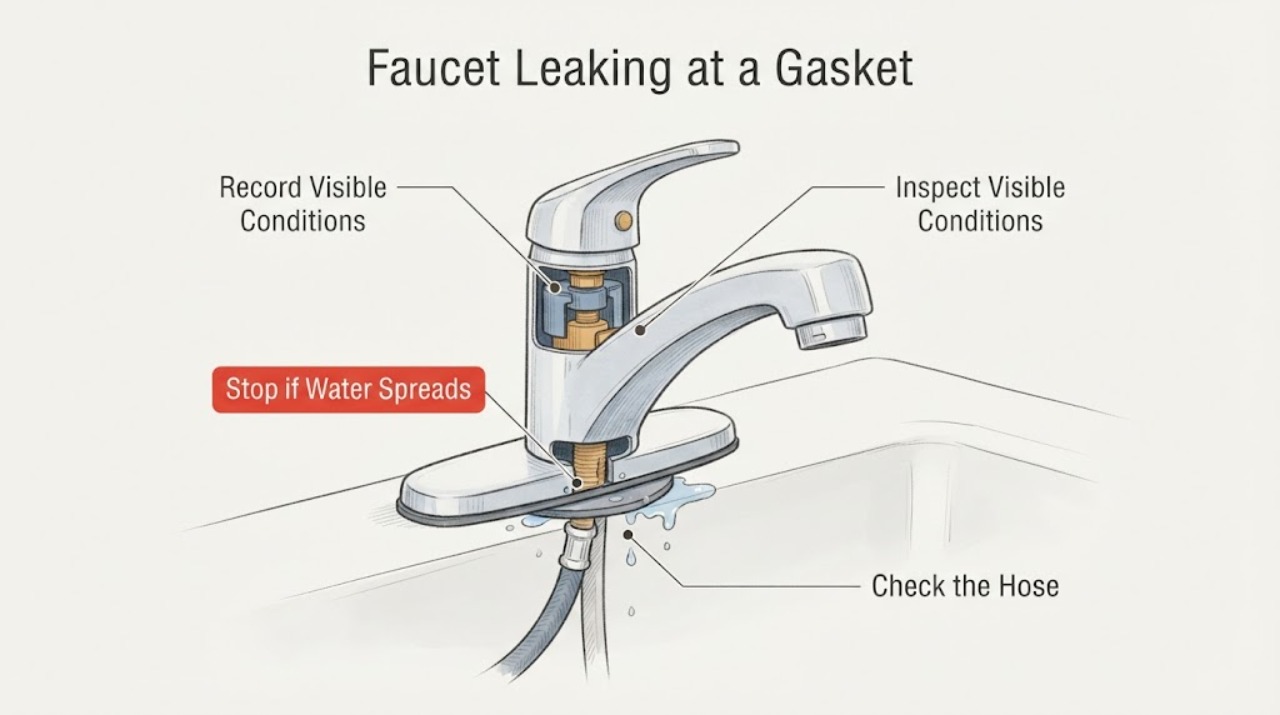
Faucet Leaking at a Gasket: Find the First Wet Point Before Replacing Parts
A faucet gasket may be worn, displaced, contaminated by scale, or not sealing because the leak is actually coming from the cartridge, stem, hose, supply connection, aerator, or the faucet base. First close the fixture's water supplies and identify the first wet point: spout, handle or stem, base or deck, supply connection, or filter or aerator.
-
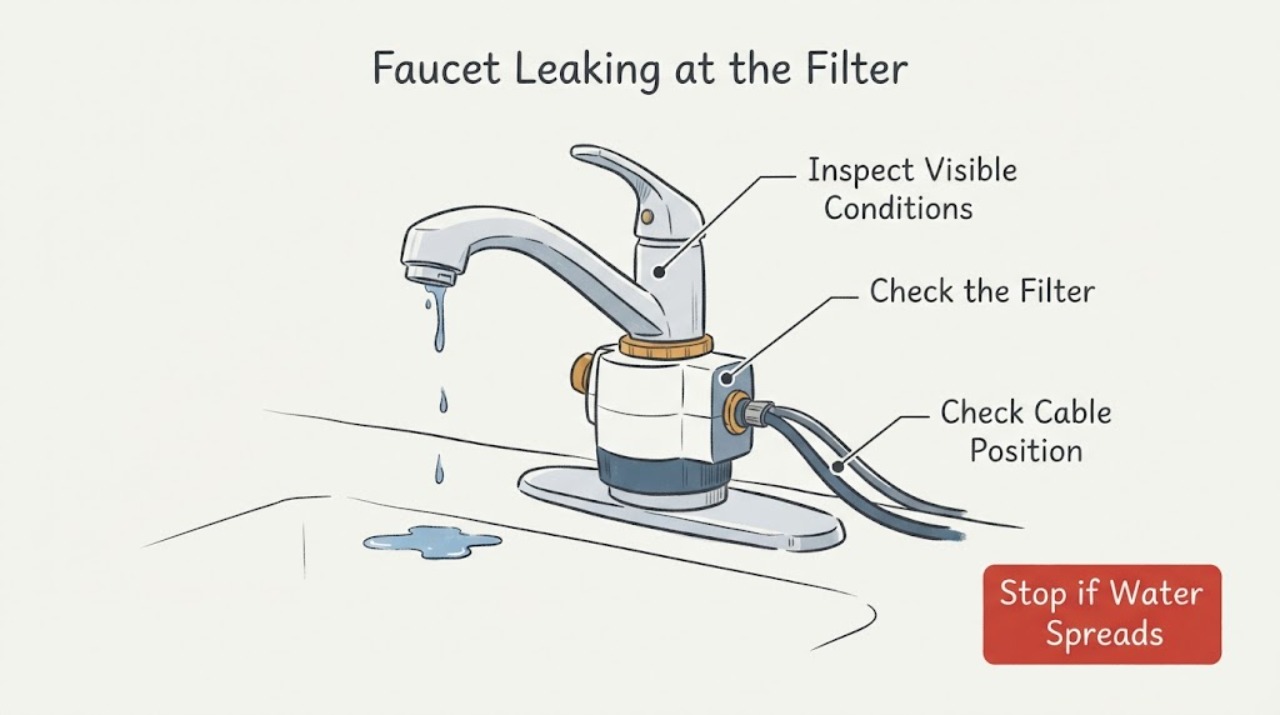
Faucet Leaking at the Filter: Check the Aerator, Housing, and Connections
First identify which filter-related part is leaking: the aerator or screen at the spout, a dedicated filtered-water outlet, an under-sink filter housing, or its tubing and fittings. Dry the visible area, open only the affected hot or cold function briefly if safe, and find the first wet point; then turn off the appropriate supply before touching a filter or connection.
-
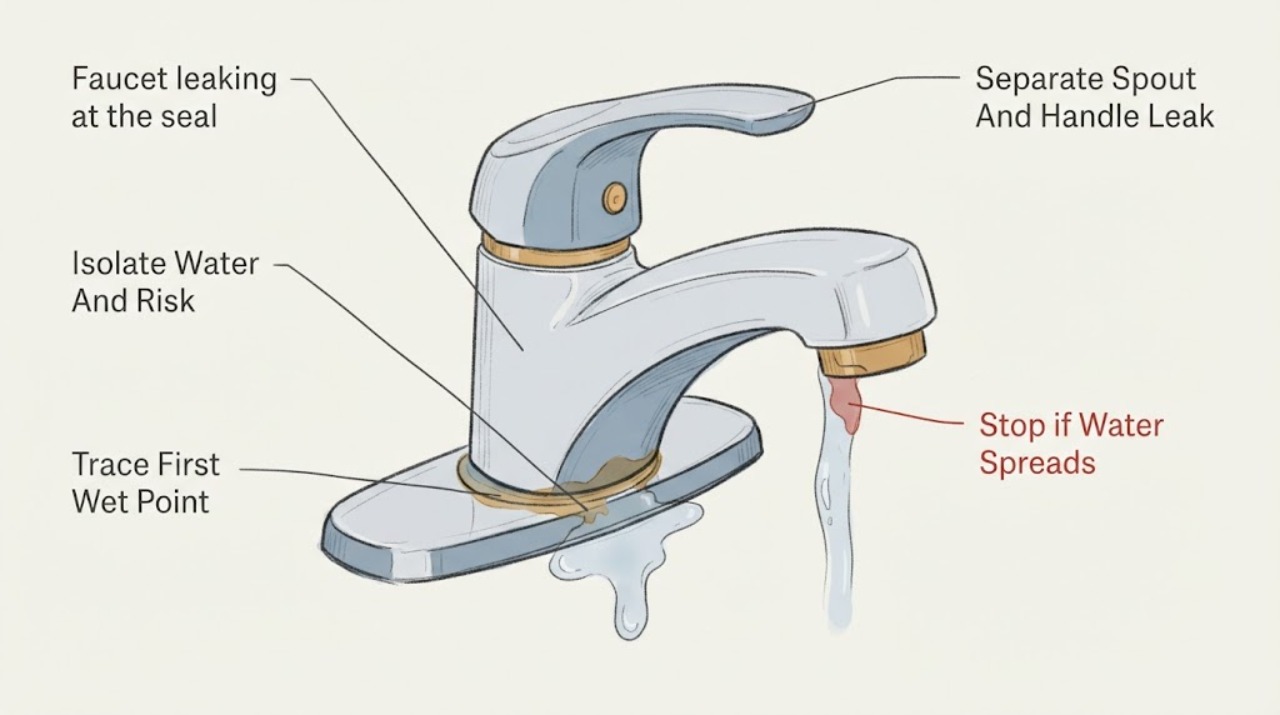
Faucet leaking at the seal: trace the first wet point safely
A faucet leak assigned to the seal is diagnosed by the first place that becomes wet, not by choosing a replacement part from the drip location alone. Turn off the faucet and, if the leak is more than a small controlled drip, close the hot and cold shutoff valves under the fixture.
-
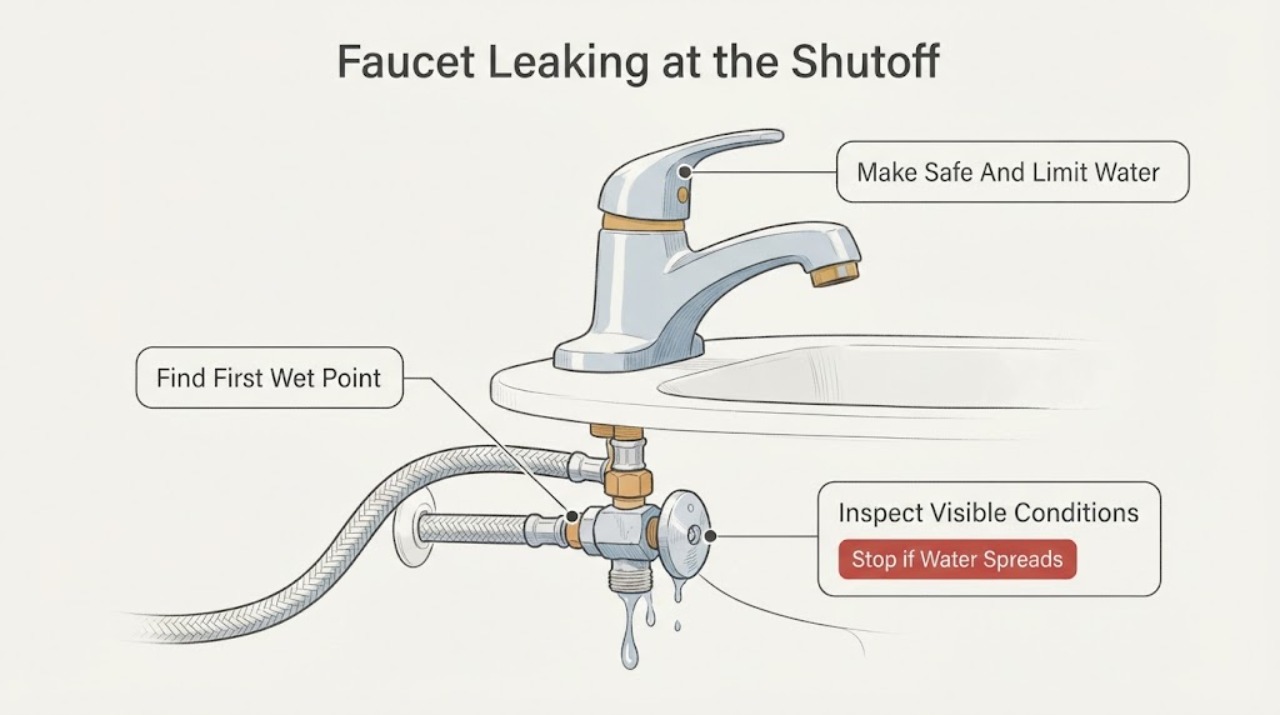
Faucet Leaking at the Shutoff Valve: Find the First Wet Point Safely
A faucet leak reported at the shutoff valve can actually begin at the valve stem or packing area, the valve body, the compression or threaded connection, the supply hose, or the wall/floor pipe and only run down to the valve. Dry the area, watch for the first new wet point, and note whether the faucet-side shutoff stops the flow.
-
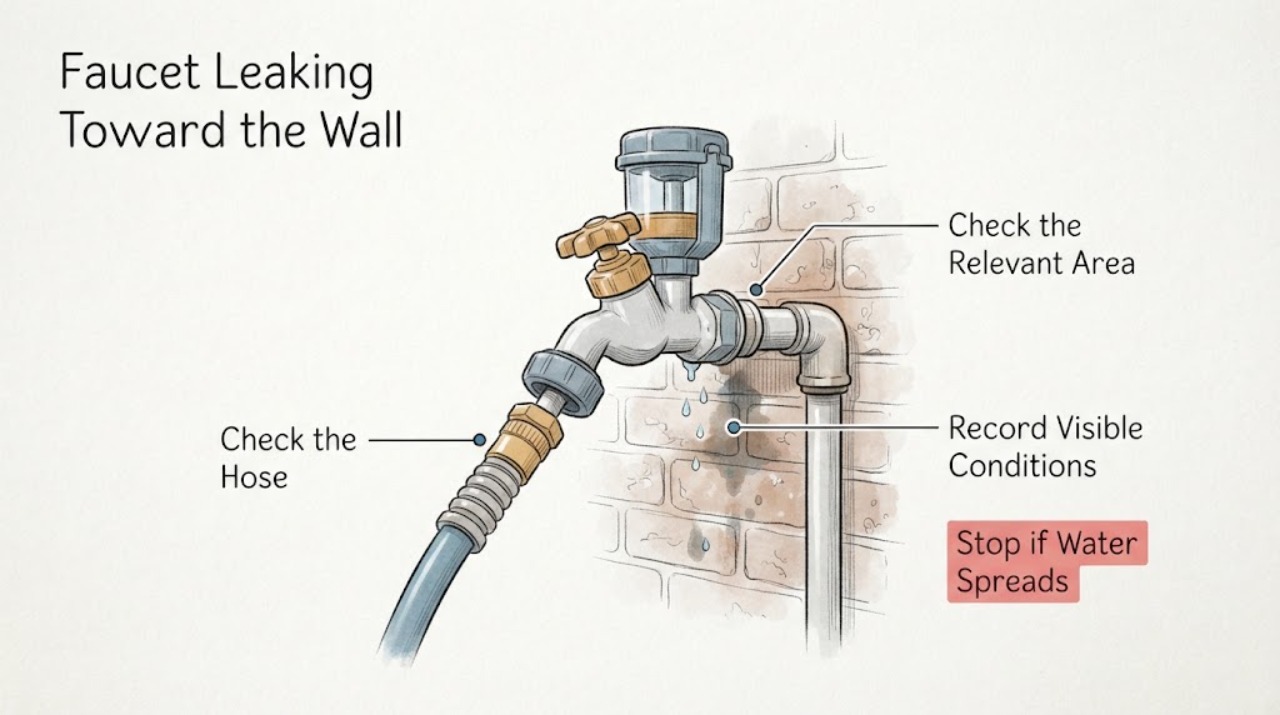
Faucet Leaking Toward the Wall: Safe Outdoor Faucet Checks
When an outside faucet leaks toward the wall, stop using that faucet and find the indoor shut-off for its branch if one is available. Dry the area and observe only from a safe position to identify whether water starts at the spout, handle, hose connection, anti-siphon device, or where the faucet enters the wall.
-
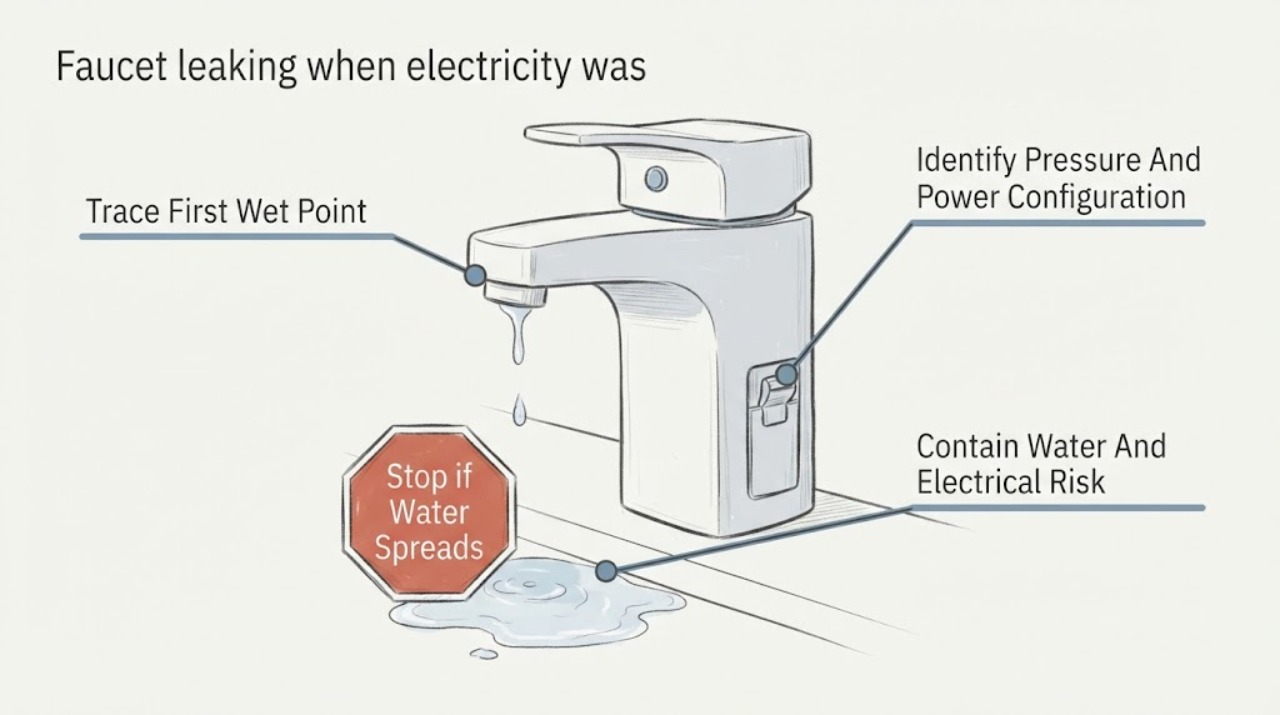
Faucet leaking when electricity was restored: isolate the water and trace the first wet point
If a faucet starts leaking when electricity is restored, first determine whether the fixture actually uses household power or whether the restoration simply re-pressurized a well pump or booster system. Many touch faucets use batteries and can operate during a power outage, while some touchless models use a powered control or solenoid; an ordinary manual faucet does not make or stop water flow because household electricity returned.
-
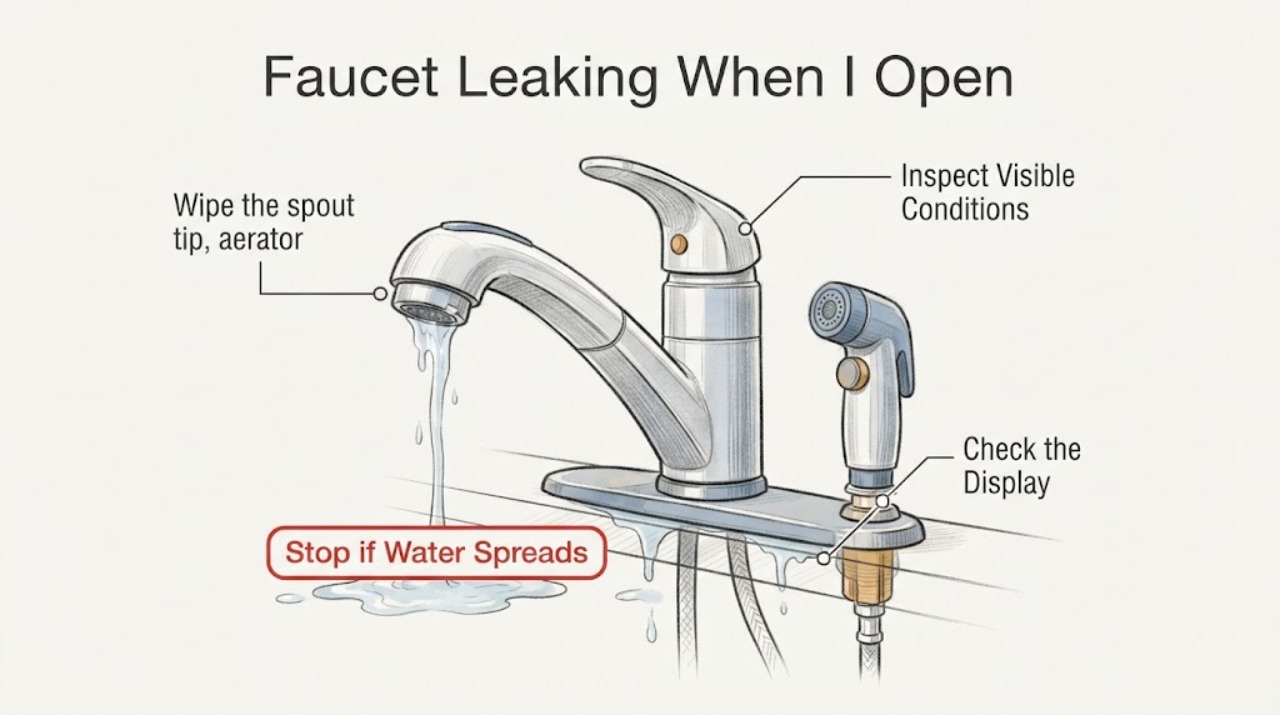
Faucet Leaking When I Open It: Find the First Wet Point
Turn the faucet off, wipe it completely dry, and open it briefly while watching the first place that becomes wet. Water at the outlet tip or aerator points to the outlet or its seal; water around a handle or the base points to a valve, cartridge, or body seal; water under the sink points to a hose, shutoff, or connector.
-
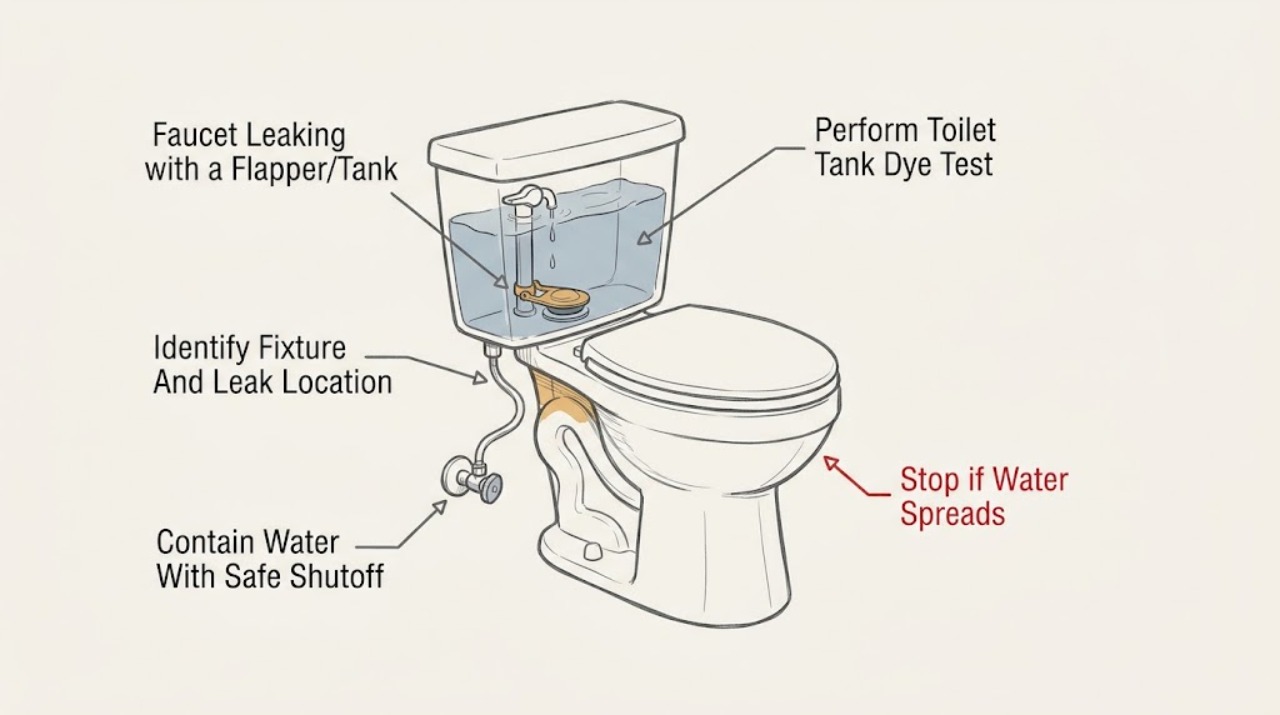
Faucet Leaking with a Flapper/Tank Note: Identify the Fixture Before Shutting Water Off
The words faucet and flapper/tank describe different fixtures, so identify the leaking fixture first. A rubber flapper and tank normally indicate a toilet: water may run from the tank into the bowl, rise into the overflow tube, or leak outside at the tank, supply connection, or floor.
-
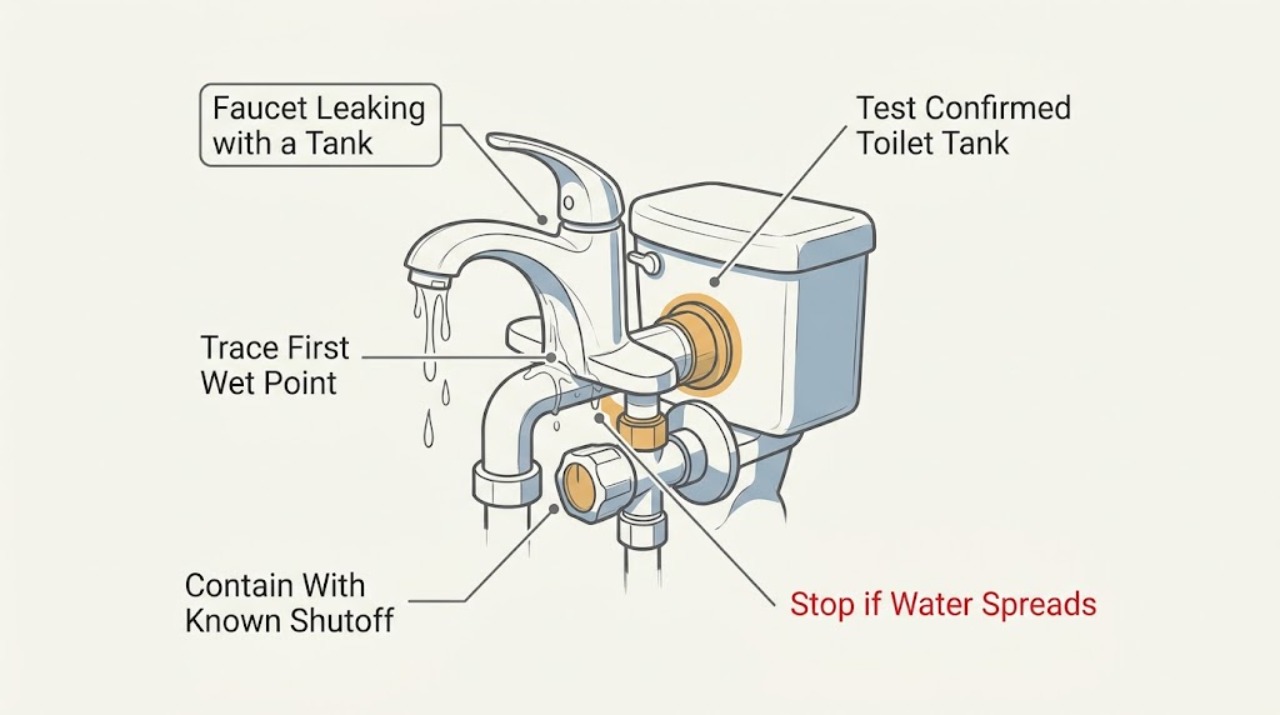
Faucet Leaking with a Tank: Identify the Fixture Before Replacing a Part
The request identifies a leaking faucet and a tank, but a tank may mean a toilet tank, a storage or filter tank, or a faucet's supply-side container. First trace the first wet point and confirm the fixture.